Table of Contents
YouTube live streaming is a great way to reach out to your audience in real-time. With millions of people tuning in every day to watch live streams, it’s no wonder that many people want to get in on the action. However, streaming live on YouTube can be a daunting task, especially for beginners. There are many things to consider when streaming live, from choosing the right equipment to testing your internet connection. In this article, we will discuss four solutions to stream live on YouTube and help you get started with live streaming.
Video Tutorial:
The Challenge of Live Streaming on YouTube
One of the biggest challenges when it comes to streaming live on YouTube is ensuring that your stream is high-quality and reliable. This means that you need to have the right equipment, such as a good camera or microphone, and a strong and stable internet connection. In addition, you need to be able to engage with your audience and keep them interested in your content. If you are new to live streaming, these challenges can seem overwhelming, but with the right approach, you can overcome them and create great live streams that your audience will love.
Things You Should Prepare for
Before you start streaming live on YouTube, there are several things that you should prepare for:
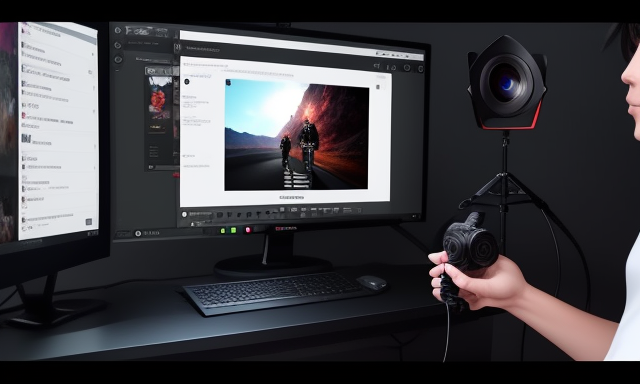
- Equipment: You will need to have the right equipment for live streaming, such as a camera, microphone, and lighting. You can use your smartphone or computer’s built-in camera and microphone, but for higher-quality streams, you might want to invest in dedicated equipment.
- Internet Connection: You will need a strong and stable internet connection to stream live on YouTube. Test your internet speed to ensure that it can handle live streaming.
- Streaming Software: You will need to use streaming software to stream live on YouTube. OBS Studio, Streamlabs OBS, and Wirecast are popular options.
- YouTube Account: You will need to have a YouTube account to stream live on the platform. Make sure that you have set up your account and enabled live streaming.
Method 1: OBS Studio
OBS Studio is a popular and free open-source software for live streaming and screen recording. It’s a powerful tool that allows you to add multiple sources to your stream, such as cameras, microphones, and other media. Here’s how to use OBS Studio to stream live on YouTube:
- Download and install OBS Studio.
- Open OBS Studio and click on "Settings" in the bottom-right corner of the screen.
- Click on "Stream" in the left-hand menu and choose "YouTube" from the "Service" dropdown menu.
- Copy your "Stream Key" from your YouTube account and paste it into the "Stream Key" field in OBS Studio.
- Configure your stream settings, such as the resolution, framerate, and bitrate.
- Add sources to your stream, such as cameras, microphones, and other media.
- Click on "Start Streaming" in OBS Studio to start your live stream on YouTube.
Pros:
- Free and open-source
- Flexible and customizable
- Supports multiple sources
Cons:
- Steep learning curve for beginners
- Requires separate audio and video settings
- May require additional plugins for some features
Method 2: Streamlabs OBS
Streamlabs OBS is a popular software for live streaming that is known for its ease of use and integrated features. It’s built on the OBS engine, but with a user-friendly interface that makes it simple to set up and start streaming. Here’s how to use Streamlabs OBS to stream live on YouTube:
- Download and install Streamlabs OBS.
- Open Streamlabs OBS and click on "Settings" in the bottom-left corner of the screen.
- Click on "Stream" in the left-hand menu and choose "YouTube" from the "Service" dropdown menu.
- Connect your YouTube account by clicking on "Connect Account" and following the prompts.
- Configure your stream settings, such as the resolution, framerate, and bitrate.
- Add sources to your stream, such as cameras, microphones, and other media.
- Click on "Start Streaming" in Streamlabs OBS to start your live stream on YouTube.
Pros:
- User-friendly interface
- Integrated features, such as donation alerts and chat
- Real-time analytics and performance monitoring
Cons:
- Less flexible and customizable than OBS Studio
- Occasional bugs and glitches
- Some features require a paid subscription
Method 3: Wirecast
Wirecast is a professional live streaming software that is popular among broadcasters and content creators. It offers advanced features and customization options, but with a higher price tag. Here’s how to use Wirecast to stream live on YouTube:
- Download and install Wirecast.
- Open Wirecast and click on "Output" in the bottom-right corner of the screen.
- Click on "Output Settings" and choose "YouTube" from the dropdown menu.
- Connect your YouTube account by clicking on "Authenticate" and following the prompts.
- Configure your stream settings, such as the resolution, framerate, and bitrate.
- Add sources to your stream, such as cameras, microphones, and other media.
- Click on "Stream" in Wirecast to start your live stream on YouTube.
Pros:
- Professional-grade features and customization options
- Supports multiple sources and layouts
- Real-time monitoring and analytics
Cons:
- Expensive compared to other options
- Steep learning curve for beginners
- Requires high-end hardware to run smoothly
Method 4: YouTube’s Built-in Live Stream
YouTube also offers a built-in live streaming feature that allows you to start streaming directly from your YouTube account without using any external software. This option is simple and convenient, but with limited features and customization options. Here’s how to use YouTube’s built-in live stream to stream live on YouTube:
- Log in to your YouTube account and click on the camera icon in the top-right corner of the screen.
- Click on "Go live" and choose "Stream" from the dropdown menu.
- Configure your stream settings, such as the privacy, title, and description.
- Choose your camera and microphone sources.
- Click on "Start Streaming" to start your live stream on YouTube.
Pros:
- Simple and convenient
- No additional software required
- Real-time analytics and chat
Cons:
- Less flexible and customizable than other options
- Limited features and sources
- Poor video and audio quality on some devices
Why Can’t I Stream Live on YouTube?
There are several reasons why you might not be able to stream live on YouTube, such as:
- Account restrictions: Your account may not be eligible for live streaming. Check your account status and make sure that you have met all the requirements.
- Internet connection: Your internet connection may not be strong or stable enough to support live streaming. Test your internet speed and make sure that you have a reliable connection.
- Hardware compatibility: Your hardware, such as your camera or microphone, may not be compatible with YouTube’s live streaming requirements. Check the specifications and make sure that they meet the minimum requirements.
Fixes:
- Account restrictions: Make sure that your account is in good standing and that you have enabled live streaming.
- Internet connection: Try resetting your router, closing any background apps, or upgrading your internet plan.
- Hardware compatibility: Use a compatible camera or microphone, or invest in dedicated streaming equipment.
Additional Tips
Here are some additional tips that will help you improve your live streams on YouTube:
- Engage with your audience: Interact with your viewers in real-time, respond to comments, and ask for feedback.
- Prepare your content: Plan your live stream in advance, create an outline, and rehearse if necessary.
- Test your setup: Test your equipment, internet connection, and software in advance to make sure that everything is working properly.
- Promote your stream: Advertise your live stream on social media, email, and other channels to attract more viewers.
5 FAQs about Streaming Live on YouTube
Q1: How do I set up my YouTube account for live streaming?
A: To set up your YouTube account for live streaming, you will need to meet the following requirements:
- Have a verified account in good standing
- Have no live stream or community guidelines strikes
- Have enabled live streaming
- Have a good internet connection and suitable equipment
Q2: Can I monetize my live streams on YouTube?
A: Yes, you can monetize your live streams on YouTube by joining the YouTube Partner Program and enabling monetization for your live streams. You can earn money from ads, sponsorships, and super chats.
Q3: How do I avoid copyright on my live stream?
A: To avoid copyright issues on your live stream, you should only use content that you have the rights to use, such as your original music or video. If you want to use copyrighted content, you should obtain the necessary licenses or permissions beforehand.
Q4: Can I schedule my live stream on YouTube?
A: Yes, you can schedule your live stream on YouTube by clicking on "Schedule for later" when setting up your stream. This will allow you to notify your viewers in advance and promote your stream.
Q5: How do I end my live stream on YouTube?
A: To end your live stream on YouTube, simply click on "End Stream" in your streaming software or your YouTube account. Your viewers will be able to watch the recorded stream afterward.
In Conclusion
Live streaming on YouTube can be a fun and rewarding way to connect with your audience and grow your channel. By following the tips and methods outlined in this article, you can ensure that your live streams are high-quality, engaging, and enjoyable for your viewers. Remember to test your setup, engage with your viewers, and promote your stream to attract more viewers and grow your channel. Good luck and happy streaming!