Table of Contents
Apple’s M2 chip, the successor to the M1 chip, is the latest chip designed for Apple’s computers. It is faster and more efficient than its predecessor, the M1 chip. With the release of M2 Macs, users are facing a new challenge of creating a Windows 10 bootable USB on Mac M2 with Ventura. This blog post aims to provide a comprehensive guide on how to create a Windows 10 bootable USB on Mac M2 with Ventura in 2023.
Bootcamp: The Old School Way to Create Windows 10 Bootable USB on Intel Mac
Boot Camp is an Apple utility that allows users to install Windows operating system on their Intel Macs. It creates a partition on the hard drive, and users can boot into Windows directly from the Mac startup disk. Boot Camp also includes a utility to create a Windows 10 bootable USB on Intel Macs.
However, with the release of M2 Macs, Boot Camp is no longer available as the M2 chip uses a different architecture. Therefore, users with M2 Macs cannot use Boot Camp to create a Windows 10 bootable USB.
Does Bootcamp Assistant App Still Work on M2 Mac?
No, Boot Camp Assistant app is not available on M2 Macs. The app is only compatible with Intel-based Macs. Therefore, M2 Mac users cannot use Boot Camp Assistant app to make a Windows 10 bootable USB on Mac.
Since the M1 and M2 chips are based on different architectures (ARM instead of x86), they require different versions of Windows to run natively. Apple had not announced any official support for running Windows via Boot Camp on M1 Macs, and it’s uncertain if they would extend that support to M2 Macs if and when they are released.
Challenges of Creating Windows 10 bootable USB on Mac (Install.wim too large)
One of the significant challenges of creating a Windows 10 bootable USB on Mac is the size of the Install.wim file. The Install.wim file contains all the files necessary to install Windows 10. However, the file size is more significant than 4GB, which is the maximum file size supported by FAT32 file system used by most USB drives.
Therefore, users need to use a different file system to create a Windows 10 bootable USB with Install.wim file larger than 4GB. This means users need to reformat their USB drives to a different file system that supports larger file sizes.
Best Way to Create Windows 10 Bootable USB on M2 Mac
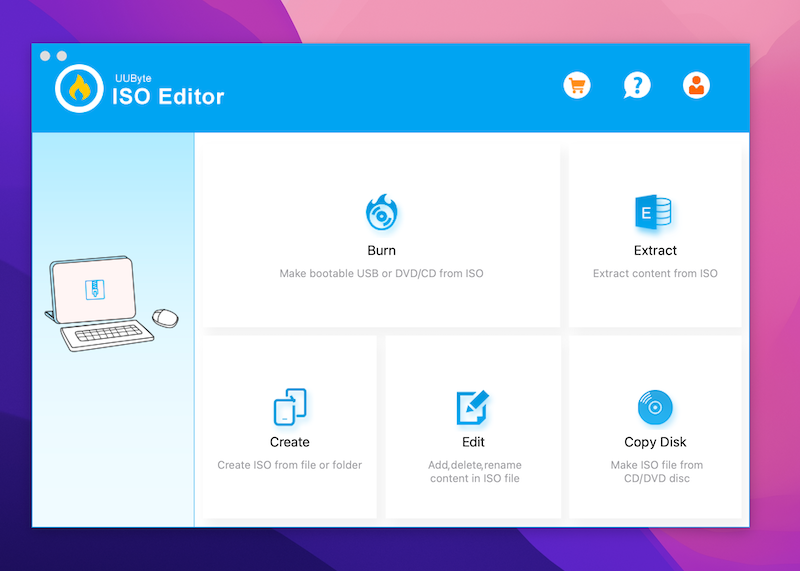
UUByte ISO Editor is a reliable and efficient software tool that allows you to create a bootable USB drive from a Windows 10 ISO file on your M2 Mac. Currently, it is the best way to create a Windows 10 bootable USB on M2 Mac for the following reasons:
- User-Friendly Interface: The software has a user-friendly interface that makes it easy for users to create bootable USB drives quickly and efficiently.
- Compatibility: UUByte ISO Editor is compatible with both Windows and Mac operating systems, making it an ideal choice for users who work on multiple platforms.
- Fast and Efficient: UUByte ISO Editor uses advanced burning technology that ensures fast and efficient creation of bootable USB drives.
- Reliability: The software is reliable and produces bootable USB drives that work flawlessly on Windows 10 PCs.
- Supports Different Partition Schemes: UUByte ISO Editor supports different partition schemes, including MBR and GPT, allowing users to create bootable USB drives that are compatible with different types of PCs.
- Flexible Boot Modes: The software supports both UEFI and Legacy boot modes, making it possible to create bootable USB drives that are compatible with different types of computers.
How to use UUByte ISO Editor to create windows 10 bootable USB on M2 Mac (Ventura):
Step 1: Download and install UUByte ISO Editor on your Mac with M2 chip.


Step 1: Download the Windows 10 ISO file from Microsoft’s website.
Step 2: Connect the USB drive to your Mac with M2 chip.
Step 3: Launch the UUByte ISO Editor application and click on the "Burn" tab from the main interface.
Step 4: Click on the "Browse" button to import the Windows 10 ISO file.
Step 5: Select the USB drive from the list of available drives.
Step 6: Choose the partition scheme as "MBR" or "GPT" based on your computer’s BIOS settings.
Step 7: Choose the file system as "FAT32" or "NTFS" based on the size of the ISO file.
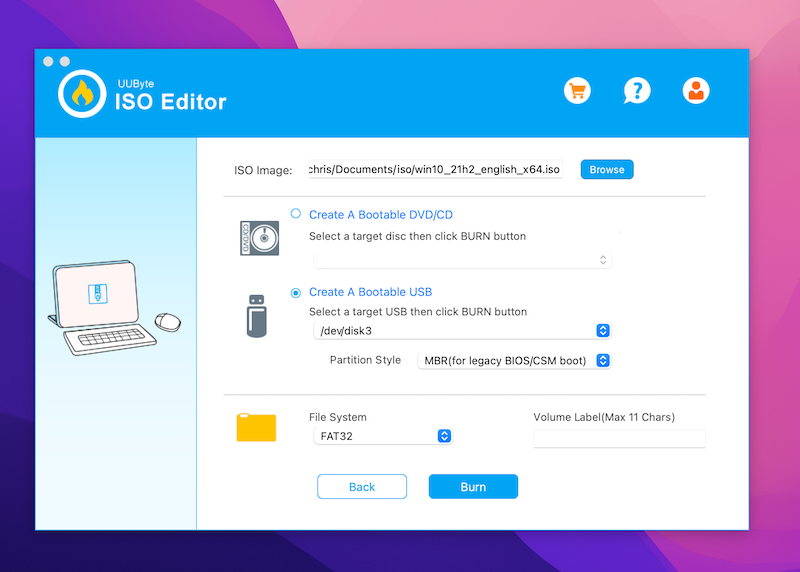
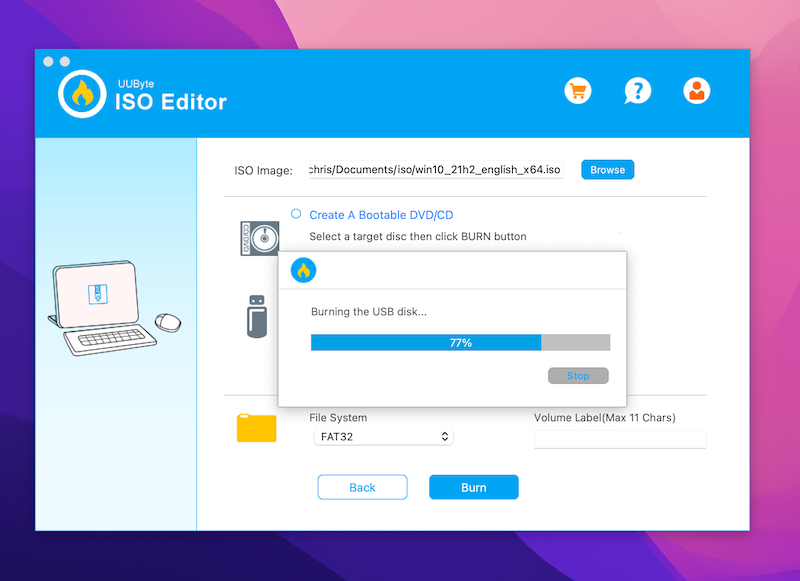
Step 8: Click on the "Burn" button to start the process.
Step 9: Wait for the burning process to complete. This may take some time depending on the size of the ISO file and the speed of your USB drive.
Once the process is complete, you can eject the USB drive and use it to boot your Windows 10 computer.
Note: You can now create a Windows 10 bootable USB on Mac Sonoma, the latest macOS version, with UUByte ISO Editor.
Video Tutorial:
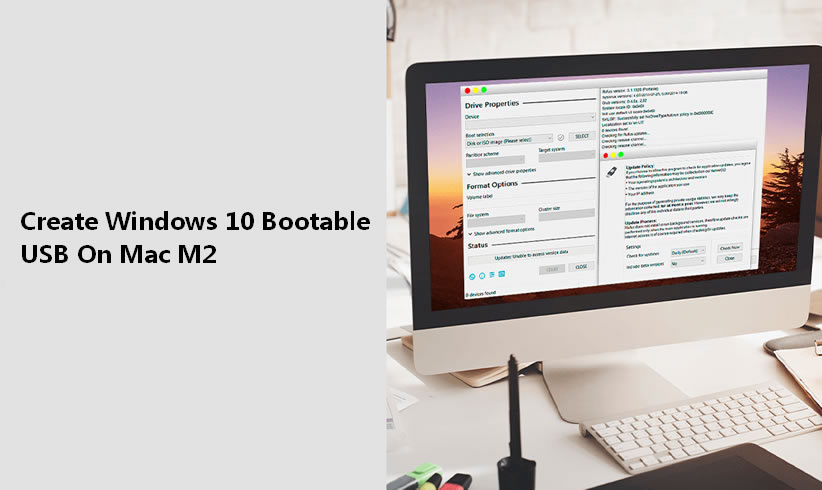
Already Have a Windows VM on Your Mac? Go ahead with Rufus
If you are using a virtual machine software on your M2 Mac, it is perfectly fine to create a Windows 10 bootable USB on Mac from a Windows virtual machine In fact, it is one of the easiest and most convenient ways to create a bootable USB drive for Windows 10.
As long as your virtual machine has access to the USB drive and has the necessary permissions to use it, you can use any Windows-based software like Rufus or Microsoft’s own Media Creation Tool to create a bootable USB drive. Just make sure to follow the instructions carefully and check that the USB drive is formatted correctly before attempting to use it to boot your Windows 10 computer.
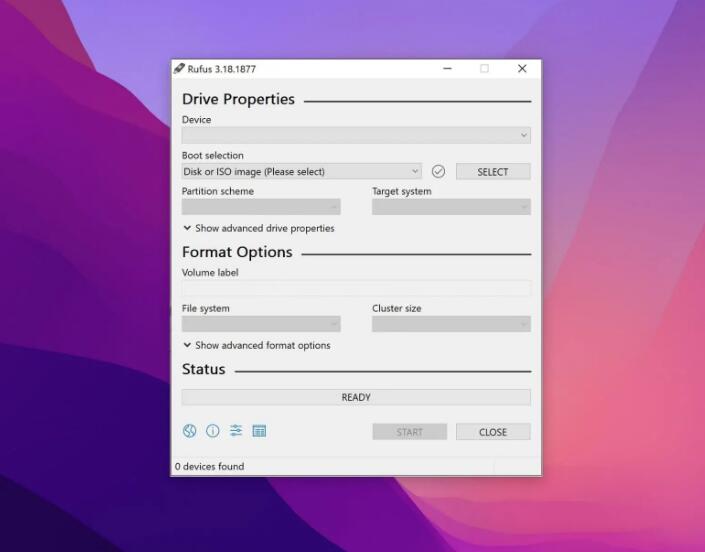
Steps to create a Windows 10 bootable USB on M2 Mac from Windows virtual machine:
- Download the Windows 10 ISO file from Microsoft’s website.
- Connect the USB drive to M2 Mac that is currently running Windows virtual machine like Windows 7 or Windows 10.
- Download and install Rufus on Windows virtual machine.
- Launch Rufus and select the USB drive you want to use from the "Device" dropdown menu.
- Under the "Boot selection" section, click the "Select" button and choose the Windows 10 ISO file that you downloaded.
- Click the "Start" button to begin creating the bootable USB drive.
- Rufus will warn you that all data on the USB drive will be destroyed. Click "OK" to continue.
- Rufus will now start formatting the USB drive and copying the Windows 10 ISO files to it. This may take some time depending on the size of the ISO file and the speed of your USB drive.
- Eject the USB drive and use it to boot your Windows 10 computer.
The Free But Complex Approach to Create Windows 10 Bootable USB on M2 Mac
If you don’t have a Windows VM or don’t want to use a third-party software application, then you can use the free but complex approach to create a Windows 10 Bootable USB on Macs with M2 chips. This approach involves using the command line to create a bootable USB drive. It is a bit more complicated than using a third-party software application, but it is free and can be done without any additional software.
- Download the Windows 10 ISO file from Microsoft’s website.
- Connect the USB drive to your Mac with M2 chip.
- Launch Terminal from the Applications/Utilities folder.
- Type "diskutil list" and press Enter to list all the connected disks and volumes.
- Identify the USB drive by its name and size. Make a note of its identifier, which will be something like "/dev/disk2".
- Type "diskutil unmountDisk /dev/disk2" (replace "disk2" with the identifier of your USB drive) and press Enter to unmount the USB drive.

- 7. Type "sudo dd if=/path/to/windows-10-iso-file of=/dev/disk2 bs=2m" (replace "/path/to/windows-10-iso-file" with the actual path to your downloaded Windows 10 ISO file and "disk2" with the identifier of your USB drive) and press Enter to start copying the ISO file to the USB drive.
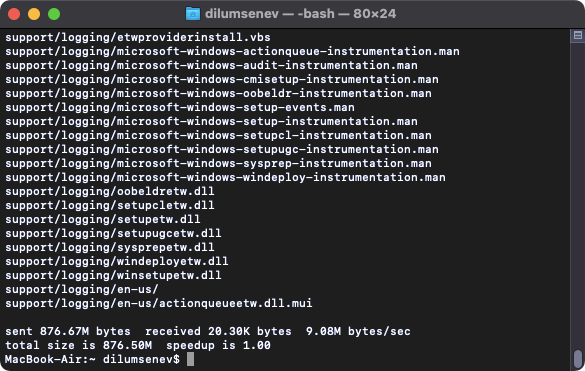
- 8. Wait for the process to complete. This may take some time depending on the size of the ISO file and the speed of your USB drive.
- 9. Once the process is complete, type "diskutil eject /dev/disk2" (replace "disk2" with the identifier of your USB drive) and press Enter to eject the USB drive.
- 10. You can now use the USB drive to boot your Windows 10 computer.
Note: Be careful when entering the commands in Terminal as any mistake can lead to data loss or damage to your system.
Frequently Asked Questions
1. Is it possible to create a Windows 10 Bootable USB on Macs with M2 chips?
Yes, it is possible to create a Windows 10 Bootable USB on Macs with M2 chips. You can use a third-party software application such as UUByte ISO Editor to create a bootable USB drive, or you can use the free but complex approach to create a bootable USB drive using the command line.
2. Does Bootcamp work on Macs with M2 chips?
No, Bootcamp does not work on Macs with M2 chips. This is because the Bootcamp application is not compatible with the M2 chip architecture.
3. What is the best way to create a Windows 10 Bootable USB on Macs with M2 chips?
The best way to create a Windows 10 Bootable USB on Macs with M2 chips is to use a third-party software application such as UUByte ISO Editor. This software allows users to compress the install.wim file and then create a bootable USB drive.
4. What is the install.wim file?
The install.wim file is the file that contains the Windows 10 installation files. It is too large to fit on a USB drive, so users must find a way to compress the install.wim file before they can create a Windows 10 Bootable USB on Macs with M2 chips.
5. Can I use a Windows VM to create a Windows 10 Bootable USB on Macs with M2 chips?
Yes, you can use a Windows VM to create a Windows 10 Bootable USB on Macs with M2 chips. All you need to do is connect the USB drive to your Mac, open the virtual machine, and then use the Windows installation files to create a bootable USB drive.
Q. Is the free but complex approach to creating a Windows 10 Bootable USB on Macs with M2 chips difficult?
The free but complex approach to creating a Windows 10 Bootable USB on Macs with M2 chips is a bit more complicated than using a third-party software application, but it is not overly difficult. It involves using the command line to create a bootable USB drive, and it can be done without any additional software.
Summary
Simply put, it is not an easy task to create a Windows 10 Bootable USB on Mac M2 with Ventura 2023 , but it is possible. The best way to create a Windows 10 Bootable USB on Macs with M2 chips is UUByte ISO Editor. This software allows users to split the install.wim file and then create a bootable USB drive. Alternatively, users can use the free but complex approach to create a Windows 10 Bootable USB on Macs with M2 chips using the command line. With the right tools and instructions, anyone can create a bootable USB drive for their Mac M2 with macOS Ventura in 2023.