Table of Contents
Burning an ISO file of Windows 10 to USB on Mac involves creating a bootable USB drive that contains the Windows 10 operating system. This might sound like a daunting task, especially if you’re new to the concept of bootable drives and ISO files. When we talk about "burning" an ISO to a USB, we’re not simply referring to copying the ISO file directly onto the USB drive. This is a common point of confusion because the term "burning" is often associated with the process of writing data onto a CD or DVD, which behaves a bit differently than a USB drive.
An ISO file is a disk image. It’s a complete, byte-for-byte copy of the content of a disk. When we "burn" an ISO file to a USB drive, what we’re really doing is extracting the content from the ISO file and writing it onto the USB drive in a way that makes the USB drive bootable.
Simply copying the ISO file onto the USB drive would just leave you with a USB drive that contains a single ISO file. The computer wouldn’t be able to boot from it because the necessary boot loader and file system wouldn’t be properly set up.
What’s The Biggest Challenge of Writing Windows 10 ISO to USB?
Writing an ISO file to a USB drive, also known as creating a bootable USB drive, can be a straightforward process with the right tools and instructions. However, it can present several challenges, particularly for those who aren’t accustomed to handling such tasks. Here are some of the main challenges you might encounter:
- Compatibility Issues: Some tools are not compatible with all operating systems or ISO files. Ensuring you use a tool that is compatible with both your current operating system (in this case, MacOS) and the ISO file you’re trying to burn (Windows 11) is crucial.
- Formatting the USB Correctly: This is a crucial step in creating a bootable USB drive. If the USB drive is not formatted correctly, the burning process may not work, and the resultant USB drive may not boot correctly. Also, be aware that formatting your USB drive will erase all existing data on it.
- The USB stick File System is FAT32 which cannot handle files larger than about 4 GB in size. The FAT32 file system, although widely compatible, does have a limitation—it cannot handle a single file larger than 4GB in size. This can present an issue when trying to create a bootable USB drive for Windows 11 (or any other software) if the ISO file is larger than 4GB.
Method 1: How to Burn Windows 10 ISO to USB on Mac using WonderISO
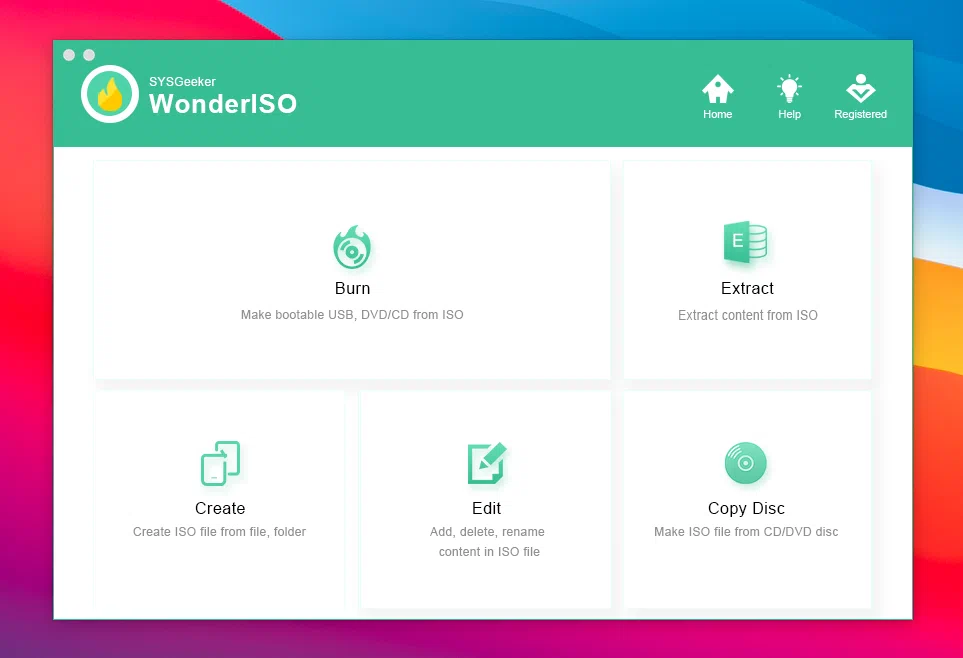
WonderISO is a powerful and user-friendly tool designed to handle ISO files. With WonderISO, you can effortlessly create, edit, extract, and burn ISO files to a USB drive, making it an ideal tool for creating bootable USB drives for installing operating systems such as Windows 10.
The benefits of using WonderISO lie in its straightforward interface and functionality. It supports a range of file systems, including FAT, FAT32, exFAT, and NTFS, ensuring compatibility with different ISO files and operating systems.


Here’s a step-by-step guide on how to use WonderISO to burn an Windows 10 ISO file to a USB drive on Mac:
Download and Install WonderISO: Visit the official WonderISO website, download the appropriate version for your Mac, and install it. Once your USB drive is ready, open WonderISO.
- Choose ‘Create Bootable USB Drive’: On the main interface of WonderISO, click on the ‘Create Bootable USB Drive’ option.
- Select Your ISO File: Navigate to the location where your Windows 11 ISO file is stored on your Mac and select it.
- Choose the USB Drive: WonderISO should automatically detect connected USB drives. Select the one you want to use.
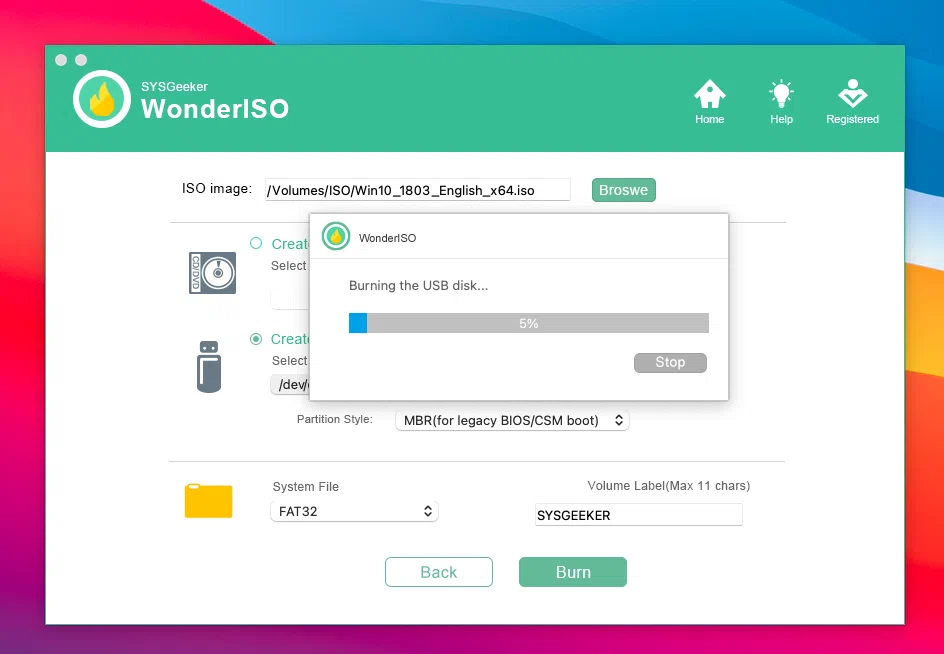
Start the Process: With everything selected correctly, you can now proceed with the creation process. Click the ‘Burn’ or ‘Start’ button to begin burning the ISO file to your USB drive. The process can take some time, depending on the size of the ISO file and the speed of your USB drive.

Once the process is complete, you will have a bootable USB drive ready for installing Windows 11.
Method 2: How to Burn Windows 10 ISO to USB on Mac using Terminal
In the following sections, we will discuss how to use Terminal to burn a Windows 10 ISO file onto a USB drive on a Mac. Please note that this process will completely erase the contents of your USB drive, so ensure to back up any important files beforehand.
Step 1. If the Windows 10 ISO file is larger than 4GB (which is common for newer versions of Windows 10), the process needs a slight adjustment due to the limitations of the FAT32 filesystem. We need to use the ExFAT filesystem instead or install wimlib and split large WIM files in Terminal.
Here are the steps to install wimlib and split large WIM files in Terminal:
Step 1: Install Homebrew
Homebrew is a package manager for Mac. It simplifies the installation of software. If you don’t have Homebrew installed, install it by entering the following command in Terminal:
/bin/bash -c $(curl -fsSL https://raw.githubusercontent.com/Homebrew/install/HEAD/install.sh)
Step 2: Install Wimlib
With Homebrew installed, you can easily install wimlib using the following command:
brew install wimlib
Step 3: Mount the ISO file
Use the following command to mount the ISO file: hdiutil mount path/to/your/windows.iso
Replace "path/to/your/windows.iso" with the actual path to your Windows ISO file.
Step 4: Split the WIM file
Go to the "sources" directory of the mounted ISO, and split the install.wim file using the following command:
wimlib-imagex split /Volumes/CCCOMA_X64FRE_EN-US_DV9/sources/install.wim /Volumes/CCCOMA_X64FRE_EN-US_DV9/sources/install.swm 3500
The number 3500 at the end of the command specifies the size in MB of the split SWM files. You can adjust this number based on your needs.
Step 5: Copy the Rest of the Files to the USB Drive
You can now copy the rest of the files from the ISO to the USB drive, just as you would in the previous scenario. The large WIM file has been replaced with smaller SWM files.
Step 6: Eject the USB Drive and ISO Volume
Once the process is complete, eject both the USB drive and the ISO volume with the ‘diskutil’ command:
diskutil eject /dev/diskX
diskutil eject /Volumes/Name_of_your_ISO_volume
Replace "diskX" with your USB drive’s identifier and "Name_of_your_ISO_volume" with the name of the mounted ISO volume.
That’s it! You now have a bootable USB drive with Windows 10, even if the original ISO file was larger than 4GB. This USB drive should now work for both UEFI and BIOS PCs.
Method 3: How to Burn Windows 10 ISO to USB on Mac using UNetbootin
UNetbootin is primarily designed for installing Linux distributions, you can also use it to burn Windows 10 ISO file to a USB drive on Mac. This can be especially helpful when you need to install or upgrade Windows on a computer without an optical (CD/DVD) drive.
Using UNetbootin to create a bootable Windows USB from an ISO file involves downloading the software, selecting the Windows ISO file, and then specifying the USB drive onto which the ISO file will be burned. The tool then creates a bootable USB drive using the ISO file. This can be booted on any computer to install the Windows OS.
Here’s how you can use UNetbootin to burn a Windows 10 ISO to a USB on a Mac:
Step 1: Download the latest version of UNetbootin from the official website (https://unetbootin.github.io/). Once the download is complete, locate the downloaded file, it should be in your ‘Downloads’ folder unless specified otherwise.
Step 2: On macOS, installation involves just extracting the downloaded .dmg file and moving the UNetbootin app to your ‘Applications’ folder.
Step 3: Connect the USB drive to your Mac. Ensure the drive has enough space for the Windows 10 ISO. The drive will be formatted during this process, so make sure to back up any important data before proceeding.
Step 4: Go to your ‘Applications’ folder and launch UNetbootin.
Step 5: In the UNetbootin window, select the ‘Diskimage’ radio button. In the same row, ensure ‘ISO’ is selected in the dropdown menu, then click on the ‘…’ button to browse for your Windows 10 ISO file.
Step 6: At the bottom of the UNetbootin window, in the ‘Type’ dropdown, ensure ‘USB Drive’ is selected. In the ‘Drive’ dropdown, select your USB drive.
Step 7: Click on the ‘OK’ button to start the process. The ISO will be burned to the USB drive, making it a bootable drive.
Step 8: You can now safely eject the USB drive from your Mac.
Now you have a bootable Windows 10 USB drive ready to install Windows on any computer. Remember to change the boot order in your BIOS/UEFI if necessary to allow booting from the USB drive.
What Are Some Common Errors While Burning ISO to USB on Mac and How to Troubleshoot Them?
1.The burn process is successful, but the USB drive isn’t bootable
If the burn process completes without error, but the resulting USB drive isn’t bootable, the problem might be with the boot settings of the computer where you’re trying to use the USB drive. Check the BIOS/UEFI settings to make sure that booting from a USB drive is enabled and that it is set to a higher priority than the internal hard drive.
2. "dd: Invalid number ‘1m'" error
This error occurs due to differences in the dd command syntax between different Unix-like systems. On a Mac, you should use 1m, but on some other systems, you need to use 1M or bs=1M.
3. The USB drive is write-protected
If the USB drive is write-protected, you won’t be able to write the ISO file to it. If the write-protect switch on the drive is enabled, disable it. If there’s no physical switch and you still can’t write to the drive, it might be a software issue or the drive might be failing.
4. "No such file or directory" error
This error can occur if the path to the ISO file or the disk identifier is incorrect. Make sure the path to the ISO file is correct and the disk identifier matches the one you found using the diskutil list command.
5. The USB drive is not recognized
If your Mac isn’t recognizing the USB drive, try plugging it into a different USB port. If that doesn’t work, try using a different USB drive. The original drive might be damaged.
How to Verify if My USB Drive is Bootable After Burning an ISO on Mac?
After burning an ISO image to a USB drive on your Mac, you might want to check if the USB drive is indeed bootable before you proceed to use it. Here are two methods you can use:
1. Check on Mac Using Disk Utility:
- Open Disk Utility (You can find it in Applications > Utilities).
- Select your USB drive from the list on the left.
- Click on the "Info" button or press
Command+I. - Look for a line that says "Partition Map Type". If your USB drive is bootable, it should say "MBR (Master Boot Record)" or "GUID Partition Map", depending on the process you used to create the bootable drive.
2. Check by Attempting to Boot From the USB Drive:
- Restart your Mac.
- As soon as the reboot starts, hold down the
Optionkey until you see the Startup Manager. - The Startup Manager will show you all the bootable devices connected to your Mac. If your USB drive is bootable, it will appear here.
- You don’t need to proceed with the boot process. Just check if the USB drive is listed and then boot your Mac as usual.
Please note, if you’re planning to use the bootable USB drive on a different machine (like a Windows PC), the best way to test it is on the actual machine you intend to use it on, because different systems might have different BIOS/UEFI configurations.
Also, please be aware that booting from a bootable USB drive might result in data loss if you proceed with the installation without proper precautions, so only proceed if you’re sure about what you’re doing.
Final Words:
Creating a bootable USB drive from an ISO file on a Mac can seem like a daunting task, especially if you’re not familiar with command line interfaces. However, with careful step-by-step guidance, it is a completely achievable task. Remember that while the Terminal is powerful, it also requires precision. A typo or wrong disk identifier could lead to data loss. Always double-check your commands before hitting ‘Enter’.
Third-party tools like WonderISO offer a more user-friendly interface to burn Windows 10 ISO file to USB drives, making the task less intimidating for those not comfortable with Terminal. Choose the method that suits your comfort level and requirements.
Ultimately, whether you’re creating a bootable USB drive for a system repair, operating system upgrade, or a clean install, the process gives you a handy tool for managing your system software. Once you’ve created your first bootable USB, you’ll find it’s a useful skill to have in your toolkit.