Table of Contents
With the increasing popularity of Apple computers and the vast number of Windows applications and games, many Mac users find themselves in situations where they need to use a Windows operating system. One solution is to make a bootable Windows USB on Mac, which allows you to run Windows OS on your Mac computer without making any permanent changes to the system. In this blog post, we will discuss the process of creating a Windows bootable USB on a Mac, the challenges you might face, and the Windows version you should choose in 2023. We will also address some frequently asked questions and provide a summary of the topic.
Why You Need to Make a Windows Bootable USB on Mac
There are several reasons why a Mac user may need to create a Windows bootable USB:
- Running Windows-exclusive applications: Some software is only available for Windows operating systems, and having a Windows bootable USB allows you to access these applications on your Mac.
Dual booting: If you need to use both macOS and Windows on a regular basis, a Windows bootable USB enables you to switch between the two operating systems easily. - Troubleshooting: A bootable Windows USB can be useful for troubleshooting purposes, such as fixing a corrupted Windows installation or recovering lost data.
- Testing software: Developers may need to test their applications on multiple operating systems to ensure compatibility and optimal performance.
- Gaming: Many popular games are only available on Windows, so having a bootable Windows USB allows you to enjoy these games on your Mac.
Video Tutorial:
Can You Make Windows Bootable USB on Apple M1 or M2 Mac?
Yes, it is possible to create a Windows bootable USB on an Apple M1 or M2 Mac, although the process is slightly different and may require additional steps. Some third-party applications, such as UTM or Parallels, can help facilitate the process. However, be aware that not all Windows applications and games may be compatible with the M1/M2 architecture due to its ARM-based design.
Method 1: Create a Windows Bootable USB on Mac with Bootcamp (Intel Mac Only)
Boot Camp is a utility provided by Apple that allows users to install and run Windows on their Mac computers alongside macOS. It enables users to switch between macOS and Windows as needed, providing the best of both worlds for those who require access to Windows-only applications or games. In this guide, we will introduce Boot Camp and provide step-by-step instructions on how to use it to create a Windows 10 bootable USB on your Mac.
1. Before starting the process, ensure that you have a USB drive with at least 8 GB of storage space. Connect the USB drive to your Mac and format it using Disk Utility (choose either FAT32 or exFAT as the file system).
2. Visit Microsoft’s website and download the Windows 10 ISO file. Select the edition and language of your choice, and make sure to download the 64-bit version.
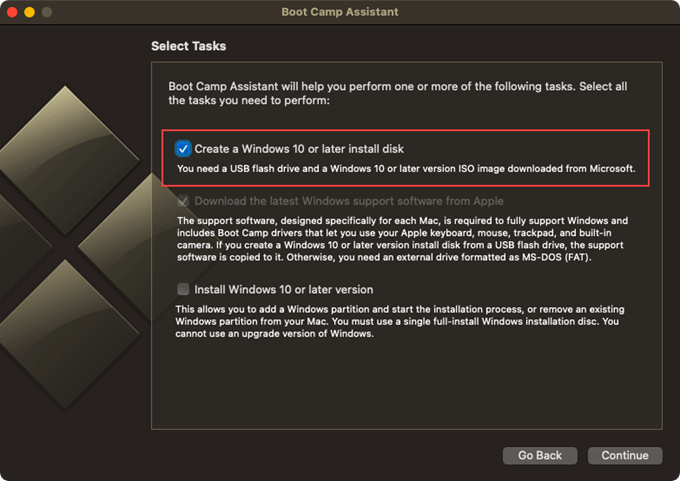
3. Navigate to the Applications folder on your Mac, open the Utilities folder, and launch Boot Camp Assistant.
4. In Boot Camp Assistant, click on "Action" in the menu bar and select "Download Windows Support Software." Choose your USB drive as the destination and click "Save." Once the software has been downloaded, Boot Camp Assistant will automatically create the bootable USB drive containing the Windows 10 installation files.
Pros:
- Native support: Boot Camp is an Apple-provided utility, ensuring better compatibility and support for your Mac hardware.
- Dual booting: Boot Camp allows you to run both macOS and Windows on the same machine without the need for virtualization software.
- Better performance: Running Windows natively on your Mac through Boot Camp generally provides better performance compared to virtualization solutions.
Cons:
- Limited to Intel-based Macs: Boot Camp is not available for Apple M1 or M2 Macs, which use ARM-based architecture.
- Partitioning required: Boot Camp requires a dedicated partition on your Mac’s internal drive, which may not be ideal for users with limited storage space.
- No live boot option: Boot Camp installs Windows on your Mac’s internal drive, unlike a traditional bootable USB that allows you to run Windows without installing it on the host machine.
Method 2: Create a Windows Bootable USB on Mac with ISO Editor (All Macs)
UUByte ISO Editor is a versatile third-party tool that allows users to manage ISO files efficiently. With its user-friendly interface and powerful features, UUByte ISO Editor is an excellent choice for creating bootable USB drives for various operating systems, including Windows 10. In this guide, we will introduce UUByte ISO Editor and provide step-by-step instructions on how to use it to create a Windows 10 bootable USB on your Mac.


How to Use UUByte ISO Editor to Create a Windows 10 Bootable USB on Mac:
1. Ensure that you have a USB drive with at least 8 GB of storage space. Connect the USB drive to your Mac.
2. Go to Microsoft’s website and download the Windows 10 ISO file. Select the edition and language of your choice, and make sure to download the 64-bit version.
3. Visit the official UUByte website, download the macOS version of UUByte ISO Editor, and install it on your Mac. Launch UUByte ISO Editor: Open the UUByte ISO Editor application on your Mac.
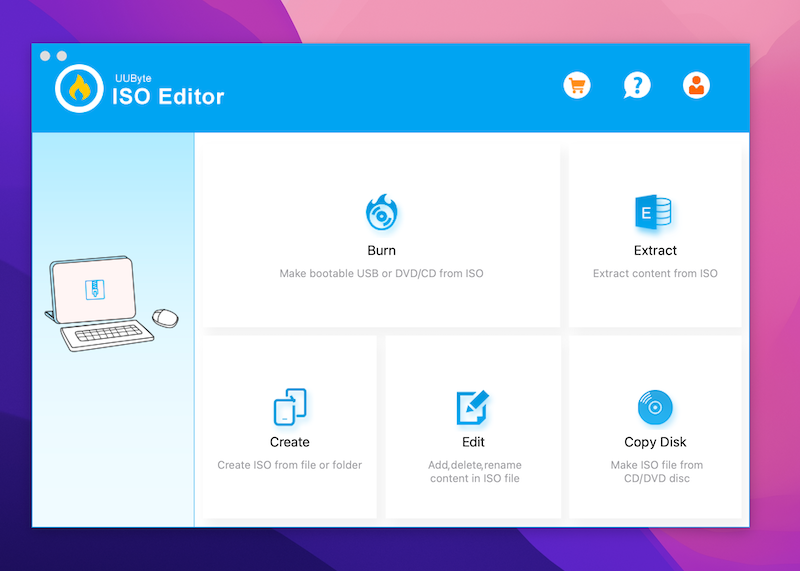
5. Click on the "Burn" option in the main interface, and then click on the "Browse" button to select the Windows ISO file you downloaded earlier.
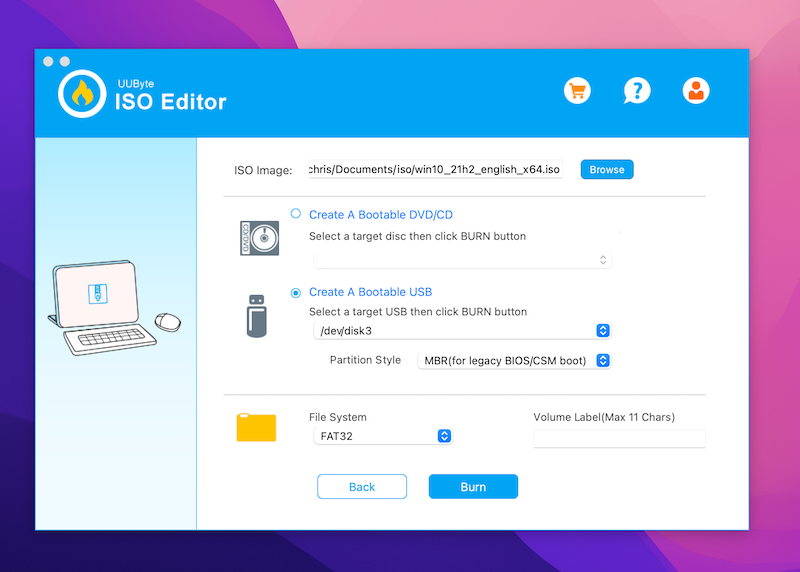
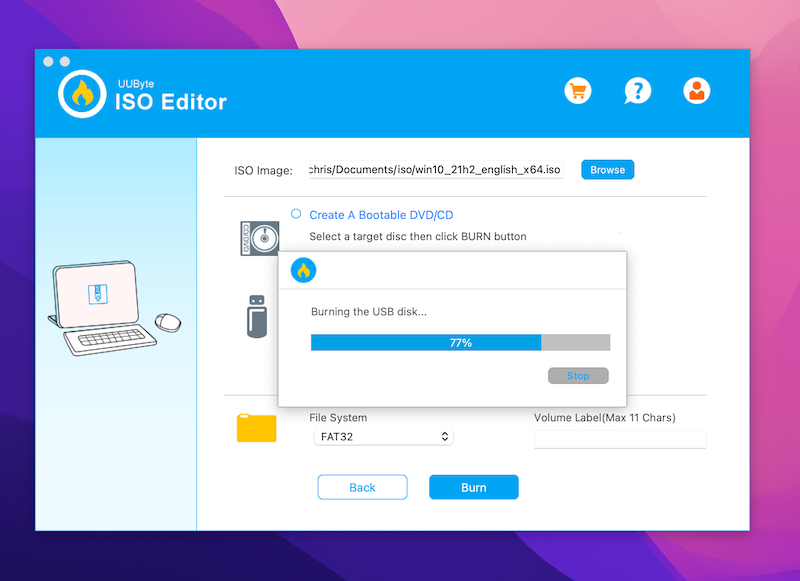
6. Create a bootable USB: Choose your USB drive from the "Destination" dropdown menu. Ensure that the "Create a bootable USB" option is selected, and then click on the "Burn" button to start the process. UUByte ISO Editor will format your USB drive and create a bootable Windows USB.
Pros:
- User-friendly interface: UUByte ISO Editor offers a simple, easy-to-use interface that makes creating a bootable USB drive straightforward, even for beginners.
- Versatility: In addition to creating bootable USB drives, UUByte ISO Editor can also extract, edit, and create ISO files for various purposes.
- Compatibility: UUByte ISO Editor works with both Intel-based and M1/M2 Macs, making it a flexible solution for creating Windows bootable USB drives.
Cons:
- Third-party software: As a third-party application, UUByte ISO Editor may not have the same level of support or compatibility as Apple’s native tools like Boot Camp.
- Cost: Unlike Boot Camp, which is included with macOS, UUByte ISO Editor is a paid software that requires a license to access its full features.
- No automatic driver installation: Unlike Boot Camp, UUByte ISO Editor does not automatically install drivers for your Mac’s hardware when creating a bootable USB drive, which may require additional steps to ensure compatibility with Windows 10.
Method 3: Create a Windows Bootable USB on Mac with UTM (M1/M2 Macs)
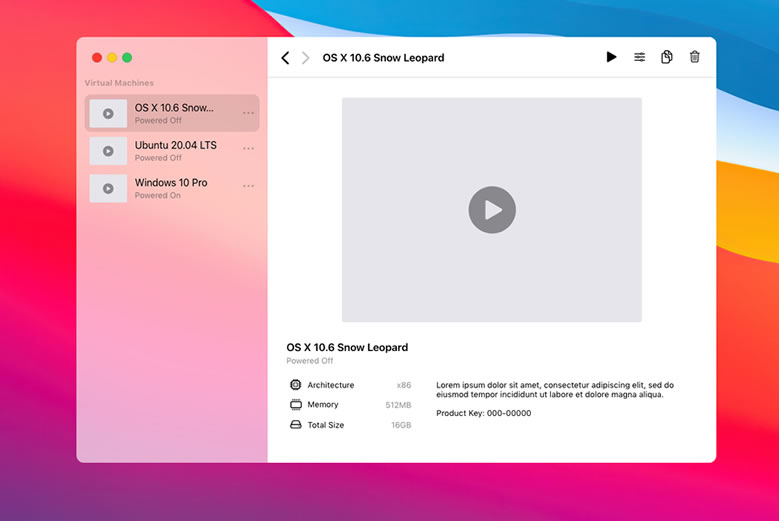
UTM is an open-source virtualization solution that allows users to run multiple operating systems on their macOS, iOS, and iPadOS devices. However, UTM is not designed for creating bootable USB drives. Instead, it enables users to run Windows (or other operating systems) within a virtual machine on their Mac, iPhone, or iPad without the need for a separate bootable USB drive or partition.
How to use UTM to Create Windows Bootable USB on a Mac:
1. Visit the official UTM website and download the latest version of UTM for macOS.
2. Follow the instructions on the UTM website to install the application on your Mac.
3. Visit Microsoft’s website and download the Windows ISO file of your choice, such as Windows 10 or Windows 11.
4. Launch UTM and click the "+" button to create a new virtual machine. Give it a name and configure the virtual hardware as needed, such as allocating RAM and creating a virtual disk.
5. In the UTM virtual machine configuration, click on the "CD/DVD" tab, and then click on the "+" button to add the Windows ISO file you downloaded earlier.
6. Click the "Start" button in the UTM interface to boot the virtual machine using the Windows ISO file.
7. Follow the on-screen instructions to install Windows within the virtual machine.
8. Get into Windows virtual machine and download Rufus free software to create a Windows bootable USB in short time.
Pros:
- No bootable USB needed: UTM allows users to run Windows on their Mac without the need for a separate bootable USB drive or partition, making the process simpler and more streamlined.
- Isolation: Running Windows within a virtual machine keeps it isolated from your main macOS environment, reducing the risk of system instability or data loss.
- Easy switching: With UTM, users can easily switch between macOS and Windows without needing to reboot their Mac.
Cons:
- Performance: Running Windows within a virtual machine may result in reduced performance compared to running it natively using a tool like Boot Camp.
- Limited hardware access: Windows running in a virtual machine may not have full access to your Mac’s hardware, which may lead to compatibility issues or reduced functionality.
- Complexity: Setting up and configuring a virtual machine using UTM can be more complex and time-consuming than simply creating a bootable USB drive.
while UTM is an excellent solution for running Windows within a virtual machine on a Mac, it is not designed for creating Windows bootable USB drives. If you are specifically looking to create a bootable USB drive for Windows on a Mac, consider using other methods, such as Boot Camp Assistant, UUByte ISO Editor, or the Terminal app.
Why You Can’t Make Windows Bootable USB on Mac
If you encounter issues creating a Windows bootable USB on your Mac, there may be several reasons:
- Incompatible macOS version: Ensure that your macOS version supports the creation of Windows bootable USB drives.
- Incorrect file format: The Windows ISO file must be in the correct format (FAT32 or exFAT) for the process to work. Double-check that you have formatted your USB drive correctly.
- Insufficient storage space: Ensure that your USB drive has enough storage capacity to accommodate the Windows installation files.
- Third-party application issues: If you are using a third-party application to create the bootable USB, make sure it is compatible with your Mac and up to date.
The Challenges of Creating Windows Bootable USB on Mac
Creating a Windows bootable USB on a Mac is more challenging than doing so on a Windows PC due to several factors, including differences in hardware, file systems, and native support. Below are some of the key challenges associated with this process:
- Limited native support: Unlike Windows PCs, macOS does not provide native tools or utilities for creating Windows bootable USB drives. As a result, Mac users must rely on third-party applications, such as Boot Camp Assistant, UNetbootin, or balenaEtcher, to create a bootable USB drive.
- Different file systems: macOS and Windows use different file systems, which can complicate the process of creating a bootable USB drive. macOS typically uses Apple File System (APFS) or Hierarchical File System Plus (HFS+), while Windows uses the New Technology File System (NTFS). The bootable USB drive must be formatted with a compatible file system (usually FAT32 or exFAT) to work on both platforms.
- Hardware differences: Mac computers use different hardware configurations compared to Windows PCs, which may cause compatibility issues when creating a Windows bootable USB. For instance, Macs with Apple’s M1 or M2 chips use an ARM-based architecture, while most Windows PCs use an x86 or x64 architecture. This difference may require additional steps or adjustments when creating a bootable USB on a Mac.
- BIOS vs. UEFI: Most modern Macs use the Unified Extensible Firmware Interface (UEFI) for booting, while some older Windows PCs may still use the Basic Input/Output System (BIOS). This difference can cause issues when creating a Windows bootable USB on Mac, as the USB drive must be set up correctly to boot in either UEFI or BIOS mode, depending on the target system.
Despite these challenges, it is still possible to create a Windows bootable USB on a Mac with the help of third-party applications and careful attention to detail. By understanding these challenges, users can better navigate the process and successfully create a bootable Windows USB drive on their Mac.
Frequently Asked Questions
Q1: Can I create a bootable Windows USB drive using macOS’s built-in Disk Utility?
A: No, Disk Utility does not support the creation of Windows bootable USB drives. You will need to use a third-party application to complete the process.
Q2: How long does it take to create a Windows bootable USB on Mac?
A: The process can take anywhere from 15 minutes to an hour, depending on the speed of your USB drive and Mac.
Q3: Can I use a bootable Windows USB drive created on a Mac with a Windows PC?
A: Yes, a Windows bootable USB drive created on a Mac should work on a Windows PC without any issues.
Q4: Do I need a product key to create a bootable Windows USB on Mac?
A: While you don’t need a product key to create the bootable USB drive, you will need one to activate Windows after installation.
Q5: Will creating a bootable Windows USB on my Mac affect my existing macOS installation?
A: No, creating a Windows bootable USB will not alter your macOS installation, as it is a separate, external drive.
Final Words
Creating a bootable Windows USB on a Mac is a useful solution for Mac users who need to access Windows-exclusive applications, games, or troubleshoot issues. Although the process can be more challenging than on a Windows PC, it is possible to create a bootable Windows USB on both Intel-based and M1/M2 Macs using third-party applications. In 2023, it is recommended to choose Windows 11 if your hardware meets the requirements. Be aware of the challenges and potential issues that may arise during the process and refer to the frequently asked questions for additional guidance.