You have a private folder on Mac that needs to be password protected so that other people can not view the content in that folder. The fact is that password protecting a folder in Windows 10 is much easier than Mac because there is no default function available on Mac. However, you can easily protect your sensitive folder by adding a password to the folder with third-pary tools. Once a password was added to folder, the content of folder will be encrypted and no one can access the files without knowing the password.
To keep your sensitive folder secure, the best way is to add a password to it. You can set a password for your folder to keep all contents inside it to be safe and prevent them from unauthorized access. There are many ways of different protections that can help you password protect a folder on Mac. Below are the best ways to do so.
Password Protect a Folder on Mac #1: Folder Unbreak
Password Protect a Folder on Mac #2: KeKa
Password Protect a Folder on Mac #3: Disk Utility
Unlike Windows, Apple does not provide built-in feature to password protect a folder on Mac. You have to use third-party app to add password to a local folder on macOS. Unfortunately, there are less tools available and most of them are only able to hide the folder instead of direct protection except for Androidphonesoft Folder Locker for Mac.
Androidphonesoft Folder Locker for Mac is a well-known software in terms of password-protecting. Apart from locking ZIP files, the tool can easily encrypt your folder with a password. Even when you do not know reading English, this folder protection tool supports other languages such as Chinese, French, Italian, Portuguese, Japanese. After you know about what is Gilisoft Lock Pro tool, just follow these steps below to set a password for a folder on your Mac.
Download the Folder Locker PKG file and righ click the file. Select Open from the pop-up menu and the program will start the installation wizard immediately. During this process, you need to input the login password to authorize the permissions.
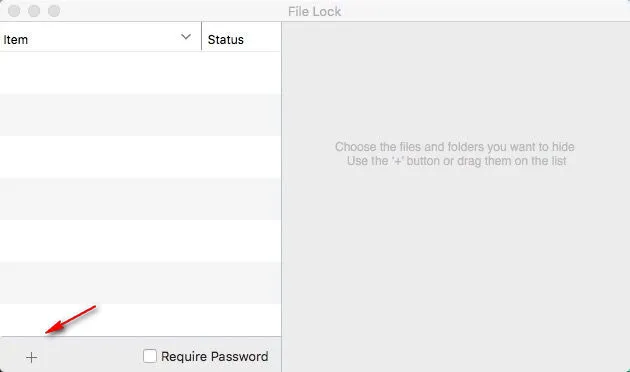
Open Folder Locker app on Mac and click the '+' icon at the bottom to add local file or folder to the program.
Once the folder being imported, tick 'Require Password'' option located besides the plus icon. After that, a password will be added to that folder.
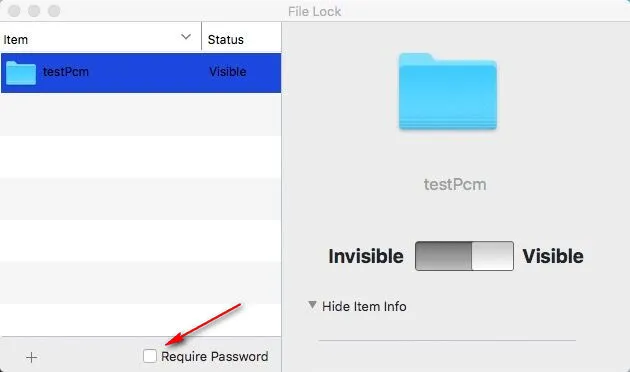
That's it! You have successfully password protected your folder on your Mac with Androidphonesoft Folder Locker software.
Another common way to password protect a folder on Mac is using acrhive app like 7-Zip, which can set a password to compressed file. 7-Zip is free and well-known app for file archiving. Unfortunately, there is no Mac version up to now.
But don't worry. There is a great replacement out there called Keka. Keka is a free open source utility that can be used to compressed files and folders with encryption on Mac. It is a great alternative to 7-Zip on macOS. To get Keka app on Mac, just visit keka.io and download the app from the website or Mac App Store. After the installation is done, follow these steps below to encrypt a folder on your computer.
Step 1: Drag and drop the folder you want to add password to.
Step 2: You will see a few settings displayed on the screen. First, choose a compress engine from the upper right corner. In our case, 7Z is selected.
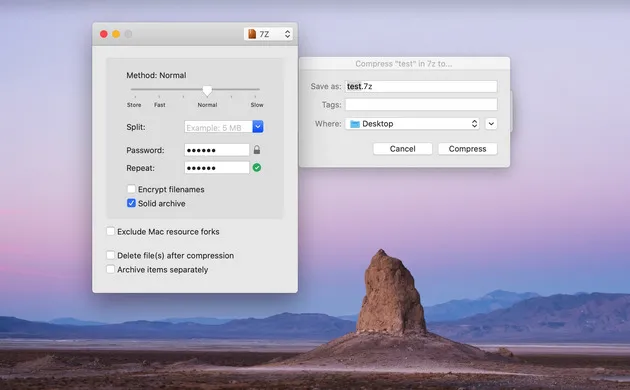
Step 3: From the password input box, please type a password and repeat it once. This is the password you have to input when you are tring to access the file after compression.
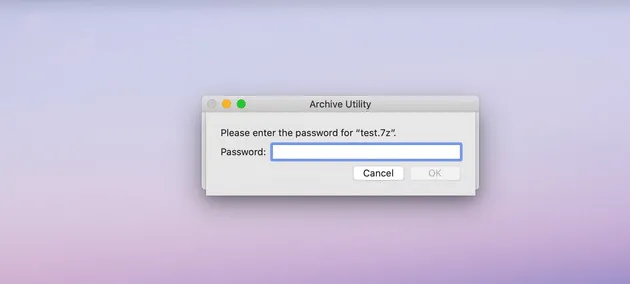
Step 4: Now the Zip file is password protected. Only granted users are able to open the file. However, you need to compress the folder again once any change is made.
Another way to add password to a folder on Mac by creating an encrypted disk image (dmg). A Disk Image file will have the properties of a separate hard drive with a better password protection and DMG is the default archive format on Mac. Furthermore, it also comes with a size limit and other options for encryption so that you can keep your folder more secure.
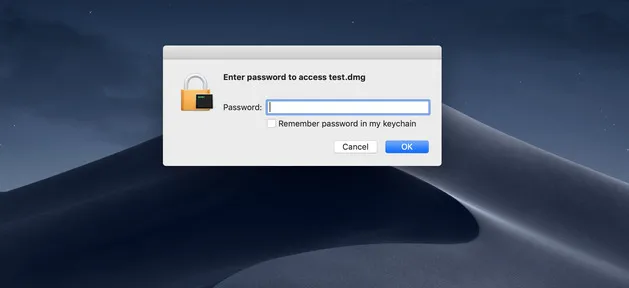
Similar to zip file, Mac users are also capable of adding a password to protect the file. This can be done with the help of Disk Utility app that is shipped with macOS. Once the password is added to the DMG file, a password prompt will be presented when someone is trying to open the file. Here is how to convert a folder to a new dmg file on your Mac to ass a password.
Step 1: Open Disk Utility app from Application folder or launchpad.
Step 2: From the File menu, click New image -> Image from Folder. Then add the target folder from the dialog.
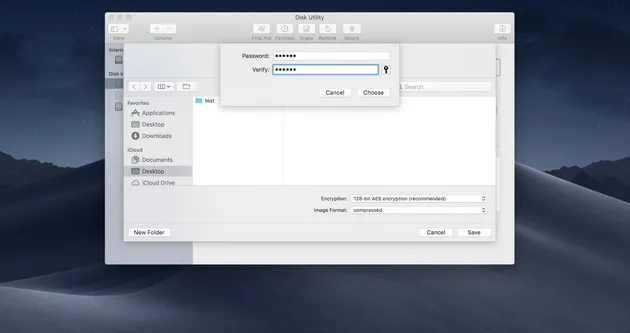
Step 3: A password input box pops up and you can now input the open password now. From the encryption settings, please choose 128-bit AES encryption, which is the recommended by default.
This is a totally free method to password protect a folder on Mac. However, it is not a direct way for the task. You have to repeat the above steps to make changes. In short, creating a password protected DMG to protect a folder is one of the best way for read only folders on Mac.
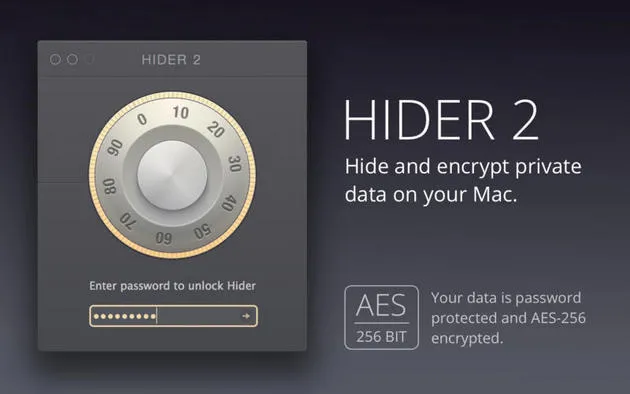
If you want to hide your folder on your Mac instead of adding a password to it, you can use MacPaw Hider 2 software to help you do that. Hider 2 is developed by MacPaw, a great software developer, also known for CleanMyMac. The software allows you to hides folders on your Mac just with one click.
The strength of this app comes from the second time you install it. Once you have opened the app for the first time, you will be notified by "Welcome Screen", showing functions of MacPaw Hider 2. The tool will end with setting a password to lock the app. If you choose Hider 2 to hide your files/folders, they will be encrypted and no one can open it without a password.
With Hider 2, hiding folders on your Mac is no longer a difficult task; you can select files and then drag and drop them into the app. Moreover, Hider 2 also allows hiding files from the contextual menu by just right clicking on it and hiding files. Hider 2 also allows you the ability to manage your files in a quick way. Take note the Menu Bar and you can access a lot of options like hiding, locking folders and even locking your app. It's a great software with the built-in functions. The tool works great for all macOS users.
If you need something more secure than methods above, we recommend creating a password-protected folder through VeraCrypt. While it takes more steps, the process is super easy and does not need you to be tech-savvy. Unlike the previous methods, you will be asked for password every time someone tries to access your private folder. Here is the instruction to set a password for your folder using VeraCrypt.
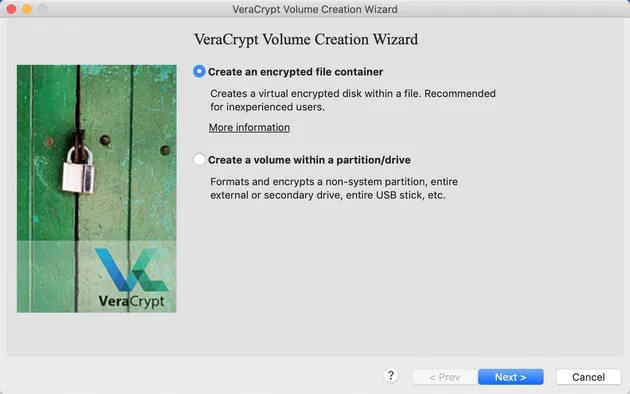
After you download and install the app on your Mac, double click to open VeraCrypt. Click on "Create Volume" button to open up Volume Creation Wizard. You will then be prompted to choose volume types. Volumes is just a file container you put on a drive or disk. Next, you will be asked by the Wizard will ask you for creating a Standard or a Hidden volume. We recommend you to choose Hidden Volume for simplicity. Name for the Volume as well as its location.
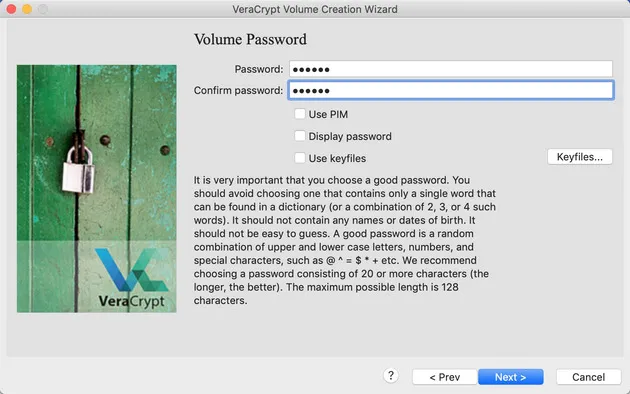
Now, set a encryption scheme. You should be careful at this step. Choose the volume size. You can set it in MB, or GB. However, if it's a large folder, you should give a space for at least 2GB. This step is to set a password for the drive. You should use a long password, but easy to remember. On the next Volume Format screen, you need to move your mouse to generate random data. After the process is complete, you will be back to VeraCrypt screen. It's now a single disk and is ready to be mounted by VeraCrypt.
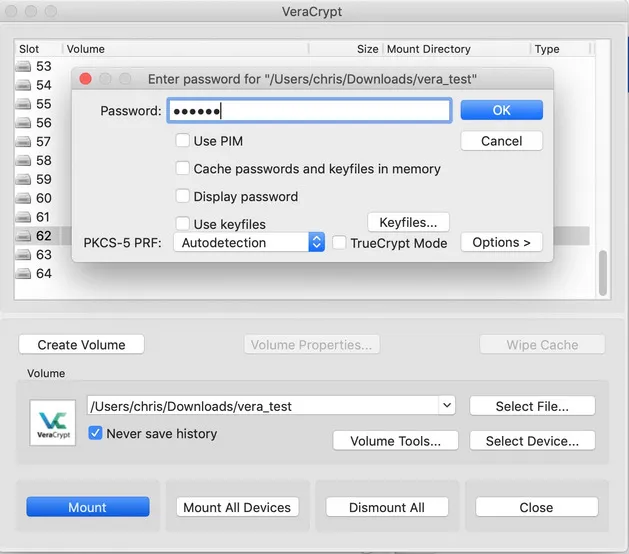
Now click on "Select File" in VeraCrypt's window head to your new VeraCrypt container. Enter your password you set and hit Enter. Take a look at your Mac internal drive and your encrypted volume was mounted. You just move the folder you want into it and you are good to go.
There are many ways to password protect a folder on Mac, but the mentioned ways above are the most popular ones. You could also Keka to encrypt the folder if you want send the files to other people. If you want to make it secure and easy to use, Androidphonesoft Folder Locker is the best option for you.
![]()
![]()
![]()
![]()

