Microsoft Word is the most popular document processing program and is part of Office Suite. Password protecting a Word document is not common in personal usage but it is quite common in business scenario. Sometimes, you just open a Word file but can not making changes because of certain protection mechanism. So what is restrict editing in Word? How to remove Word restrict editing in a simple way?
Generally, there are two different types of password protection that can be applied to a Word document: File Open Password and Restrict Editing Protection. The Open password is the password you should enter before opening the document, and the Restrict Editing password is the more commonly used one in cases where the document needs to be distributed or shared as a read-only version. It allows the user to access and view the document, but not make any changes, including copying, editing and printing the document. Specific parameters can be set for various types of editing.
You should know that word password recovery is a complex process that often takes hours or even days depending on what computer you're using, what resources it has, what wordlists you're using for password combinations and a lot of other factors. But blanking or removing a password from a Word doc is much faster, almost instantaneous. This is because the processes are completely different from each other.
So, how do you remove the Restrict Editing password from a .doc or .docx file? Let's look at two scenarios: when you know the password and when you forgot it.
When the password is known, it's easy to remove restrict editing protection from the Word program itself. However, there's a little navigating to be done before you can access the Restrict Editing option. You will need to go through the File > Info page to get there. You'll also find other options, but you're looking for Restrict Editing, which will open the document and display the restriction settings in a small window on the right side. Here's how to remove it:
Step 1: Open the document that has the editing restriction enabled.
Step 2: Click on File and go to the Info tab. Here, click on Protect Document, and you'll see several options including access restriction, encryption and adding a digital signature. Click on Restrict Editing, and it will again go to the document view, with the restrictions panel displayed on the right.
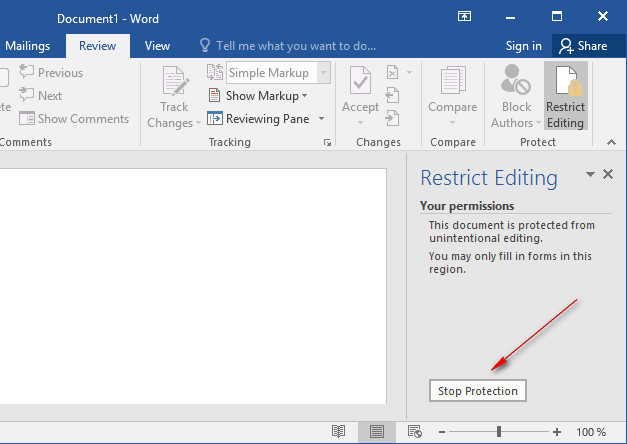
Step 3 : At the bottom of the panel, you'll see a button that says Stop Protection. Click on it and enter the password, then confirm with OK. The Restrict Editing option is now removed for the document and you may do whatever edits or changes you need to.
If you know the password for the Restrict Editing feature, then you can use this method. But what happens when you forget the password? In this instance, you'll need to use a third-party software like the one shown in the next section. Not many software utilities can do the job properly, so make sure you only use an application that maintains data integrity at all times, whether it's for recovering the access password or for removing the edit restrictions.
Androidphonesoft Word Password Remover is an user-friendly application that can be used to remove both Open password as well as Editing password from word . The two options work differently because in the case of the recovery method for the Open password, the actual password is cracked. To remove Restrict Editing, this is not required, and you can do this for a number of Word files at the same time. The passwords for Restrict Editing will be instantly removed, and unlocked versions of your files will be saved in a destination specified by you.
The best feature is its usability. It scores very high on user-experience and user-friendliness because of how it's designed. Novice users will find it simple enough to understand, and professionals will appreciate the powerful processes that go into removing access and edit restrictions from any version of MS Word. Once you run a Word doc through this software, you can freely edit, copy and print content without worrying that the data inside has been touched. This is one of the major problems of password software - solved!
Support: Word 2016, Word 2013, Word 2010, Word 2007 and Word 2003
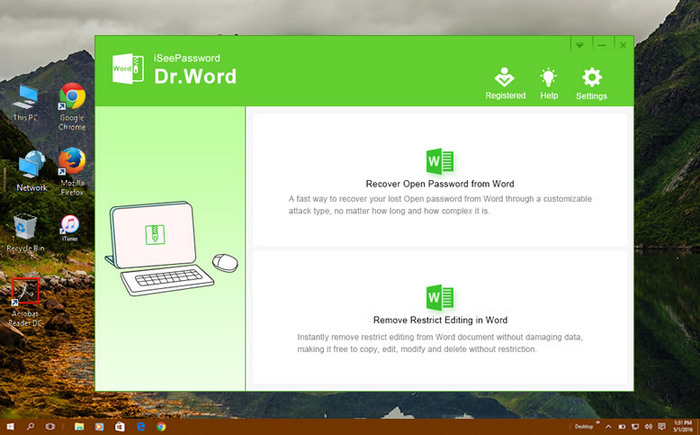
Download and install the software on your PC. Launch the program and select the option to remove Restrict Editing.
Use the Add File button to import as many Word documents as you need to remove the restrict editing protection.
You can also define a custom output folder, or just save the resulting unprotected files in the source folder where the locked versions are. Click on Start to begin removing the restriction on the files. When you go to the destination folder, you will see a copy of Word document available for editing without restrictions.
There are many similiar software appearing in Google search result but no matter how hard you search, you won't find a simpler, more powerful software than this for removing both access and edit passwords in all versions of Microsoft Word. We have done the testing for you so you don't need to waste time on making the decision.
![]()
![]()
![]()
![]()

