Why do you need a Windows 10 Bootable USB? Bootable USB drive is meant to make life easy for anyone involved with Windows repairs, installations and other tasks. Now that there are more than 700 million computers and mobile devices running Windows 10, a bootable disk will help a lot of system administrators save a lot of time when troubleshooting issues or doing reinstallations and clean installs.
The biggest advantages of having a Windows 10 bootable USB are portability and convenience. Since such a disk will contain the Windows preinstallation environment or WinPE required to boot the device, it can be used in cases where the computer is disabled, hard drives corrupted and many other scenarios. Having it on a disk means not having to create an installer each time you need it. Just create the bootable USB or disk once and use it for any Windows 10 repair or recovery problems, including doing clean installs or reinstallations.
Part 1: Why is So Hard to Create Windows 10 Bootable USB on Mac?
Part 2: Create Windows 10 Bootable USB with Mac Disk Utility
Part 3: Create Windows 10 Bootable USB with ISO Burner for Mac
Unfortunately, for Mac users, it can pose a problem because boot disks typically contain ISO disk image files that carry the necessary boot information for a Windows 10 installation. Since Mac does not natively support ISO (their own format for disk images is DMG), you need a special utility to burn an ISO to USB disk. Your bootable disk or drive can't be created on a Mac unless you're familiar with Boot Camp Assistant or a similar utility that will allow you to create a USB installer for Windows 10. How do you overcome this challenge?
Disk Utility is a built-in app made by Apple official. It is the stock tool to burn, erase, format and convert image files like .iso or .dmg. However, this option was removed from macOS High Serrira and Mojave. If this was the case, please move to Part 2, which supports all major Mac OS X and macOS versions.
To make a bootable installation USB with Disk Utility, the first step is to open it from Launchpad. You will not see the app icon directly. Instead, it is groupped in "Other" folder in Launchpad. Click the Disk Utility app icon and insert a USB flash drive into the Mac.
Now, right click on the USB name on the left sidebar and erase the drive with MS-DOS (FAT) from the pop-up window. This action will delete all data on the USB so make sure backing up the data first. After that, drag and drop the Windows installation iso file to the user interface and the app starts to write ISO files to that USB. This takes approximately 30 minutes to complete.

The best recommended approach is to take the help of a user-friendly application like ISO Burner for Mac. It is the most appropriate software for this requirement because it allows you to handle ISO on Mac as if they were native files. All you need to do is download and install the application, then get the correct ISO file from Microsoft and burn it to a USB flash drive with ISO Burner.
This utility has a 98% success rate for burning ISO files to disks and drives. If you have any experience creating Windows installer disks, you'll know that the typical success rate is quite low. That means wasted time because of repeated attempts to create a boot disk that actually works. And that's not all. ISO Burner also has a suite of other tools to manage ISO files. You can edit them, add or remove files, copy a disk to an ISO image and even rename the file. It is an extremely versatile and reliable utility for Mac, and it boasts a smooth and clean interface that is very user-friendly even if you have no experience working with ISO disk images.
Install ISO Burner on your Mac. You can download the file from the above link. Once installed, you will need the Windows 10 ISO. Make sure you get the appropriate version from Microsoft's downloads page for Windows 10.
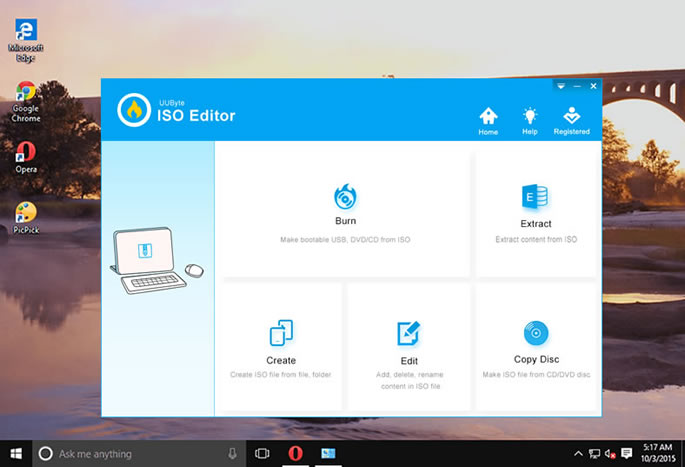
Launch the program and click on the section that says Burn. You will also see other functions like Extract, Create, Edit and Copy Disc. We'll talk about those in a bit. For now, after clicking Burn, you will see a new window with burning options for USB and DVD/CD. This flexibility is one of the best features of ISO Burner.
Insert an USB stick with sufficient space to hold a Windows 10 installation file. The medium will be automatically detected by the software and prepared for the burn. Select the ISO file by clicking the Browse button against the ISO Image field. Next, select the appropriate boot scheme and file system. If you're not sure, leave it in default.
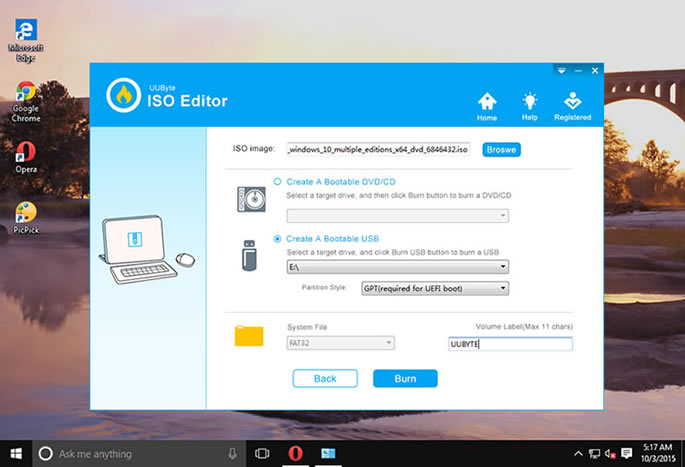
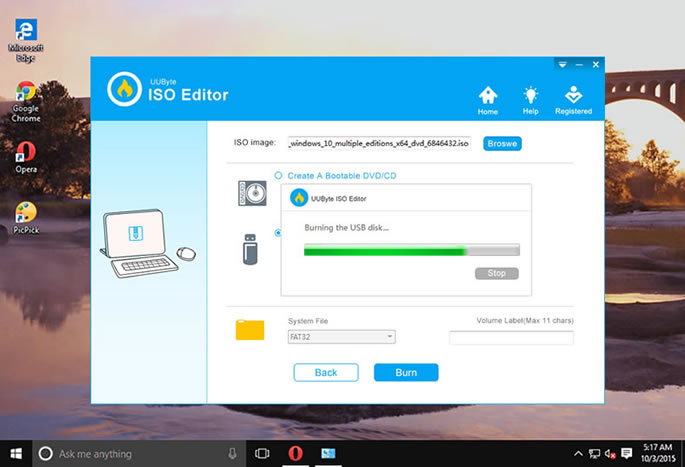
Finally, click on Burn, and your bootable USB for Windows 10 will be created in a few moments. This will be a 100% working copy that you can then use for whatever installation, repair or recovery purpose you require.
Androidphonesoft ISO Burner is one of the greatest apps available on Mac for creating bootable Windows 10 USB. Many of the other tools are not working on latest macOS High Serria or Mojave. But ISO Burner does support the latest macOS.
One of the reasons why I love Apple product is that it always license carefully to client's advice. There are millions of Mac users still having the need to run Windows app on their Mac computer. You had to buy additional and expensive app to achive this but now it is fully possible for free.
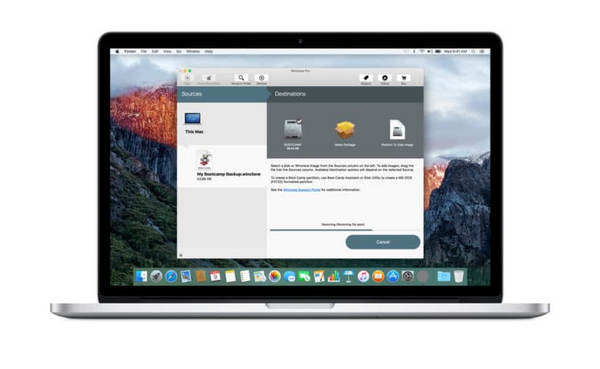
Boot Camp Assistant, formly Bootcamp, is the official app to make Windows 10 bootable USB on Mac. Simply open the app and follow the prompted instructions to complete the task. Wait, why you are not recommending Bootcamp as subtitle says?
Basically, Boot Camp is just a minimal prototype product. The bootable USB created by Bootcamp can be only used on Mac computer for dual boot. The USB not being recognized on Windows 10 computer so it is uselessly if you want to use it on a Windows computer. In addition, the burning process is extremely slow. It took me waiting for 1 hours to get the disk. Instead, it only takes about 15 minutes for ISO Burner.
All it takes is a couple of clicks to get a bootable USB burned on your Mac. Boot Camp Assistant is one of the alternatives, but it's a tedious process and not very easy to execute if you don't have the right experience. With ISO Burner, you not only get a native ISO experience on Mac, but a convenient suite of tools for extracting the contents of an ISO, removing or adding files without having to mount it as a virtual drive, saving specific content directly to your computer and so on. Not many tools can provide you with the convenience, flexibility and reliability that ISO Burner offers, which is why it is one of the most important Mac tools to add to your arsenal of applications.
![]()
![]()
![]()
![]()

