It's 2018, CD/DVD drive is getting vanished. And, even computer manufacturer companies like Dell stopped providing DVD drive on its laptops. Because USB drive can do the exact same thing, which CD/DVD drive was capable of. Previously, we need to burn ISO to CD/DVD in order to install Windows OS. But, we can use USB now.
So you have an ISO file and USB flash drive, how do you burn an .iso file to USB to make it bootable? Which software you should take help from? Honestly, there are so many ISO burning software and it is really hard to choose one if you knew little about ISO. That's why we made a list from the most popular ISO to USB burning tools. Please check out and find the best for you.
ISO to USB Burning Tool 1: UNetbootin
ISO to USB Burning Tool 2: ISO Editor
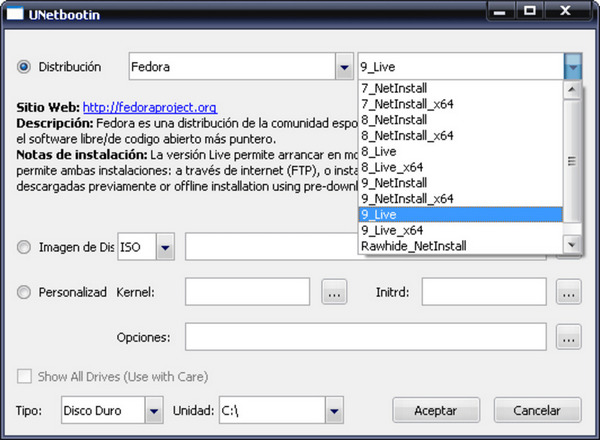
If you have never created a bootable USB drive. Then, you might don't know from where to download ISO. Then, UNetbootin is the best software for you. It has an inbuilt "distribution" section that helps you download Linux, DOS, and many other ISO files. However, If you're looking for Windows ISO, then you need to download it from the Microsoft site.
Apart from distribution, UNetbootin can help you to burn various system utilities. You can check distribution and supported system utility list on site. Like Rufus, you don't need to install it. Simply download it, and its ready to use.
Step 1: Download UNetbootin and run it as Administrator. (It's available for Windows, Linux, and macOS.)
Step 2: Now, Insert USB drive, and UNetbootin will show you details.
Note: If you don't have ISO file to burn, then choose "distribution" radio button. Then select OS and version. After that click on "OK" button to start the process. Though, the process will take time based on your internet speed because UNetbootin will download distribution ISO file.
Step 3: If you have already downloaded ISO file. Then choose "DiskImage" radio button. To select ISO file, click on "..." button. (Three dots button.)
Step 4: After selecting ISO file, make sure right USB drive is selected. And, after that click on "OK" button, and the software will start burning.
Cons:
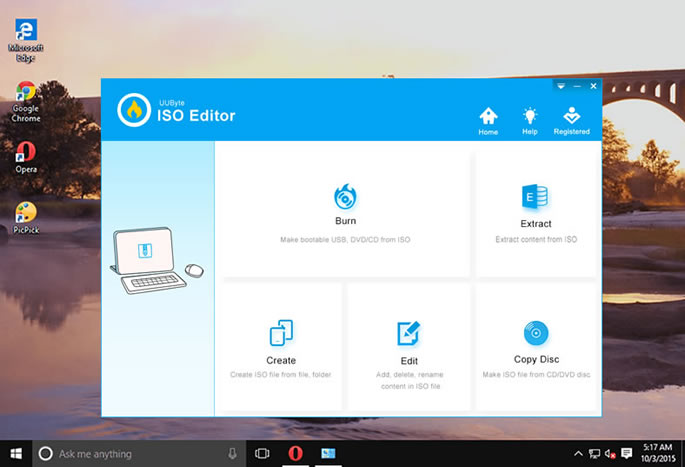
Androidphonesoft ISO Editor is a superb toolkit for manipulating ISO files, including burning, editing, extracting and creation. You can easily burn ISO to CD/DVD or USB with this amazing tool. The burning speed is much faster than free burning software and it supports all three file system: FAT, FAT32, and NTFS. What's more, it is fully compatible with all version of Windows (32-bit and 64-bit), including Windows 10, Windows 8, Windows 7 and Windows Vista.
Plus, the software comes with two burning modes to create bootable USB . In bootable USB mode, two Partition style available in this software: MBR (for legacy BIOS/CSM boot) and GPT (required for UEFI boot). Basically, the success rate is near 100% for ISO burning.
Click on the above button to download software on a computer. Run the setup file, and install it. You just need to hit next button 3-4 times.
After completing installation launch this ISO burner software, insert an USB drive into the computer and click on "Browse" button to add ISO file to the program.
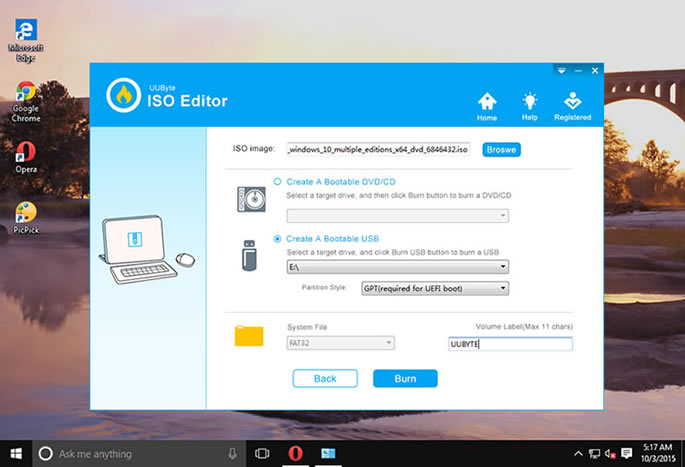
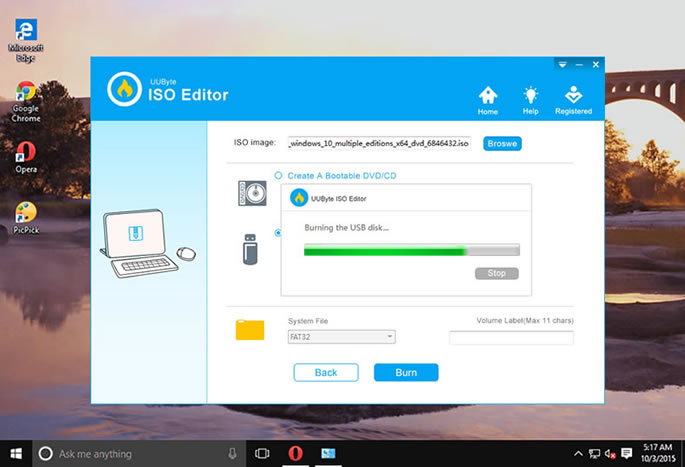
In this step, you need to choose partition style for burning USB drive. After that, click on the "burn" button. You will get a bootable USB within 5 minutes.
UNetbootin is free and open source. But many users are complaining that they can't able to boot from the created bootable drive. Because there isn't any software support available for open-source software. Instead, ISO Editor provides great customer support and you can even burn ISO to USB on Mac. So, if you face any issue with it, you can get fast reply from their support team.
Still looking for a software to Burn ISO to a USB drive? Then you can try out Etcher. It allows burning operating system images into a thumb drive and USB drive. Apart from Windows, Etcher is available for macOS and Linux. The software also validates flashing. So, you'll not face any problems while booting.
Though, in comparison to other software, Etcher writing speed isn't good. But still, the software interface is quite user-friendly. Etcher isn't lightweight like other software.
Step 1: Download Etcher and run the setup file. Immediately the installation process will get started.
Step 2: When the installation process will get complete. The software window will appear.
Step 3: Connect USB drive first. Then, in software click on "Select Image" and select ISO file.
Step 4: Etcher will automatically detect USB drive. Though, you can use the change option, if using multiple USB drives.
Step 5: Click on the flash button. And, etcher will start burning ISO to the USB drive.
Cons:
Rufus is a completely free and open source Windows application. That is used to create a bootable USB drive. The software is available in 39 languages. With Rufus, you not only can create bootable USB drive. But also can create bootable memory sticks. However, you can't create a bootable CD/DVD drive with it.
It is compatible with Windows 7 and newer version. Also, it doesn't matter you're using 32 bit or 64 bit OS. Because Rufus is a portable tool. You don't need to install it after download. Creating a bootable drive with Rufus is super easy. You can follow these steps to burn ISO to USB.
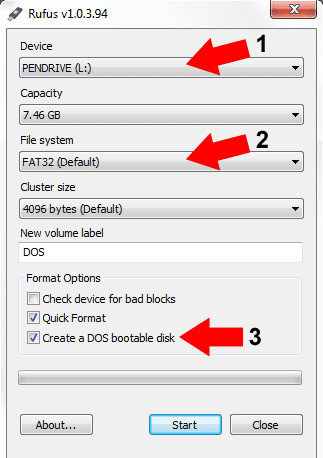
Step 1: Download latest version of Rufus from Rufus official site.
Step 2: Run Rufus*.exe file as administrator. Plug in your USB drive and Rufus will instantly show drive details.
Step 3: Click on "select" option to import ISO file. If you want, you can change the volume label. If not, then simply click on "start" button. And Rufus will start burning ISO to the connected USB drive.
If you want to format the USB drive, and want to make it non-bootable. Then, don't use file explorer for it. Rufus can help you to format the drive. Simply, Close, and run Rufus again. In the boot selection drop-down menu, select "Non-bootable" option. And, after that, click on "start" to format.
Cons:
So these are the software, which you can try to burn ISO to the USB drive. Although there are many tools left to discuss. But, these four software's are enough and offers all the required features for ISO burning. If you don't want to spend money and have good knowledge about creating a bootable drive. then Rufus and UNetbootin are the right choice for you.
If you want to try multiple versions of Linux but don't know from where to download ISO, then you can download UNetbootin software. At last, if you want to burn a CD/DVD drive and these three software aren't working for you, then you can get a copy of ISO Editor. You will get lifetime customer support and update.
![]()
![]()
![]()
![]()

