HEIC is Apple's relatively new image format that utilizes superior compression techniques to create lossless image files that are small in size. While this is a great format for Apple devices, especially if you are memory-constrained, the HEIC format can't be handled natively on Windows or Android devices. That means you either need to use an Apple computer or iOS device, or you need to convert it to a more global format such as JPG. This article shows you how to convert HEIC image files into the standard JPG format using three different methods.
Dropbox has a feature that allows you to upload HEIC images as JPGs. The conversion is done during the upload, and anyone with access to that location can download the files as normal JPGs rather than in the HEIC format. Follow these steps shown below:
Step 1: Download the latest Dropbox to your iOS device and install it, assuming this is where your HEIC images are stored.
Step 2: Open the app and tap on the gear icon to go to Settings, then tap on Camera Uploads.
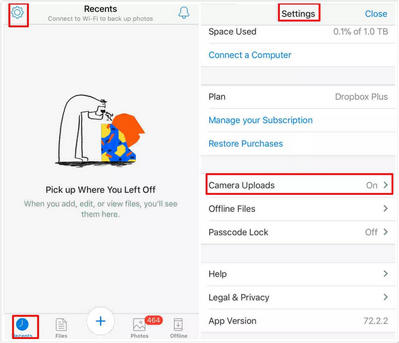
Step 3: Now choose the Save HEIC Photos as option and select JPG as your preferred format.
Step 4: Now, when you click on the "+' symbol to upload photos from your Camera Roll, the HEIC images will all be converted to JPG automatically.
This method works when your images are stored in an iOS device. But what if you only have them on your computer? In this case, you will need another software to do the conversions for you in bulk or one at a time.
Windows 10 has no native app to open HEIC image so we need third-party converters to help you complete this task. In here, TunesBro HEIC Converter is recommended becasue of its efficiency and quality result. This robust software is highly reliable, and will losslessly convert all your HEIC files into JPG or PNG in bulk. The big advantage is that there is no limit to how many conversions you can do in bulk mode. It also offers a single mode where you can convert images one at a time. In addition, it allows you to include EXIF metadata along with the files so other applications can use the information.
One of the most attractive features of the TunesBro HEIC Converter is its interface. The deliberately simple design doesn't distract you from the task at hand, and new users will find it extremely easy to use. Here are the detailed steps to use this software:
Download and install the latest version of TunesBro HEIC Converter to your computer. It is available for both Windows and Mac systems.
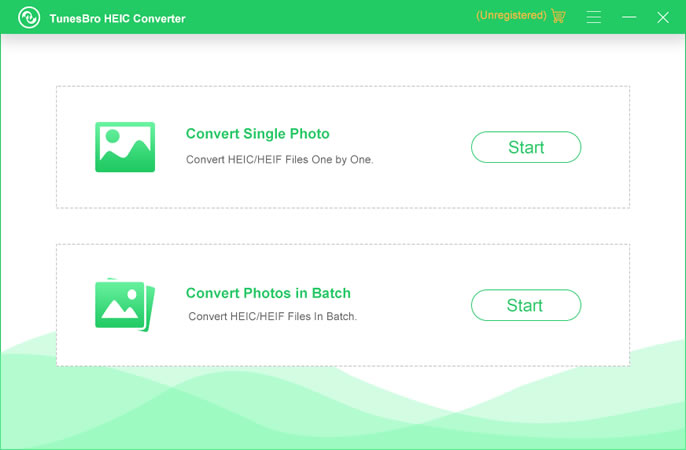
Launch the software and select the appropriate mode - Single Conversion Mode for one-by-one conversions and Batch Conversion Mode for multiple images.
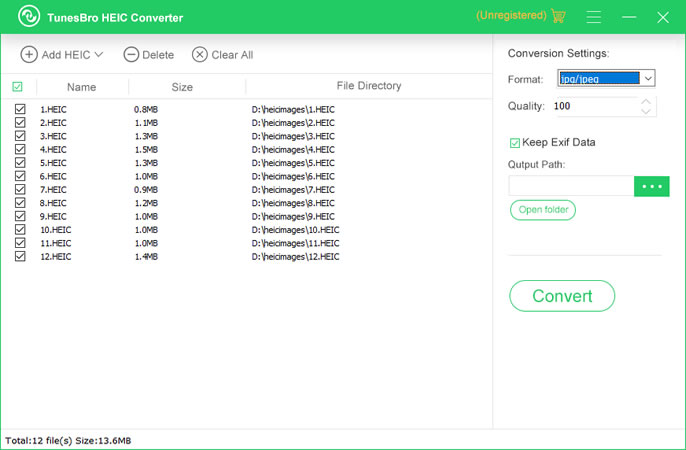
In the main window, you will see an option to "Add HEIC". Click on it and select whatever images you want to convert. Now choose the output format (JPG or PNG), conversion quality, whether to include EXIF data and the output path. Hit "Convert" to complete the process.
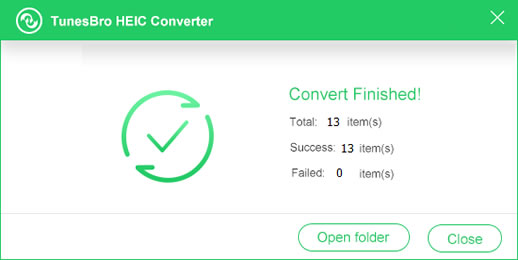
All selected images will be stored in the predefined location on your computer, and you can now share it with anyone who uses Windows or Android. If you are going to sync them with an iOS device later on, you may want to retain the HEIC files rather than delete them.
Since macOS is closely related to iOS, you can easily view HEIC and HEIF images using the Preview app. Unfortunately, this only works with macOS High Sierra and Mojave at the moment. What if you have an older OS version like El Capitan or Yosemite? In this case, there are a couple of ways to view HEIC files.
If you're generating these files on an iOS device, you can set it up so that the images are saved as JPG in the first place, not as HEIC or HEIF.
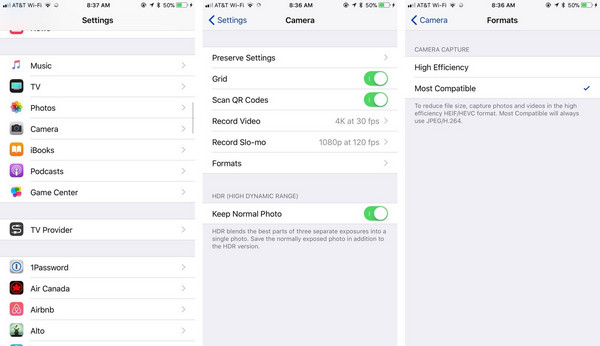
Step 1: Go to Settings on your iDevice, then tap on "Camera" and "Formats".
Step 2: Under "Camera Capture", change the selection from "High Efficiency" to "Most Compatible". This second option will make sure that only JPG is used when storing images locally. That way, you can directly view them on a Mac running an older macOS or Mac OS X version.
The other scenario is when you already have the files in HEIC and you want to view them on older version of Apple's desktop operating system. You can do this using Dropbox, but you must have the application installed on your iOS device as well as your computer. Here's what to do:
Step 1: Upload the images to Dropbox from your iOS device. You can do this by tapping on the "+' symbol and selecting photos to upload.
Step 2: On your computer, log into the same Dropbox account. The uploaded images will be viewable on your Mac even though it does not natively support HEIC.
It might seem strange that Apple would use an image file format that's not easily viewed even on Mac computers, but it's actually not. Even iOS versions aren't available for all older devices. It is Apple's way to ensure that their device users keep upgrading their hardware to take advantage of new iOS versions and other new features. The HEIC/HEIF format is one such innovation, and if you want to view it on any other device, you need tools like the ones described above. If you handle HEIC and HEIF images on a regular basis, it makes sense to get TunesBro's HEIC Converter. You can do bulk conversions, and you won't have to worry about loss of quality for stunning photos shot on your latest iPhone or iPad.
![]()
![]()
![]()
![]()

