Issues like software failures, multiple crashing or even a dead Windows 10 computer can be easily taken care of with a Windows 10 bootable USB. Creating Windows 10 bootable USB on PC is much more easier as a lot of free tools available. The situation is much more different and tense on Mac. What makes the things wrose is that Boot Camp app is no longer working on latest macOS Catalina.
We could find a lot of tutorial about creating Windows 10 bootable USB on Mac. But most of them are out of date and mainly for macOS Mojave or High Serria. The truth is that there are numerous improvent and upgrades on macOS Catalina and we need find out new ways to create Windows 10 bootable USB on Mac Catalina. Here are 3 ways to create Windows 10 bootable USB on macOS Catalina. But before that, make sure to download Windows 10 ISO file required for the process.
Part 1: Create Windows 10 Bootable USB Mac Catalina via UUByte
Part 2: Create Windows 10 Bootable USB Mac Catalina via Terminal
Part 3: Create Windows 10 Bootable USB Mac Catalina via Etcher
We will share 3 different methods to create Windows 10 bootable USB on macOS Catalina and the easy one comes first. So you won't waste time on other solutions that takes more time to get it done. In here, we will use UUByte ISO Editor for Mac as an example.
UUByte ISO Editor is specially designed software for creating bootable USB from Windows ISO. You can use it on a Windows PC or Mac computer with latest version (Catalina 10.15.3). Packed with well-crafted UI, UUByte ISO Editor is the No.1 software for ISO burning, editing and extracting on macOS. You can hardly find any better alternatives who could compete with UUByte ISO Editor on Mac. Don't believe it? Why not taking a shot and starts creating a Windows 10 bootable USB on Mac Catalina.
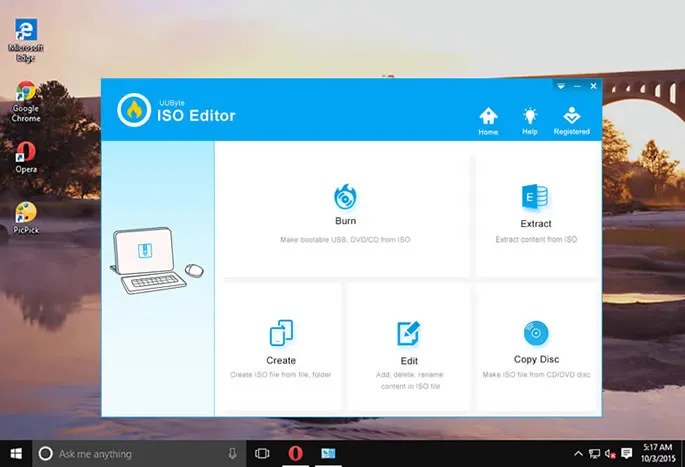
First and foremost, download UUByte ISO Editor and install it on macOS Catalina. Make sure drag the app icon to Application folder so the icon shows in Lanuchpad. When the software is opened, you need to input the login password to grant the permissions.
Insert the USB drive into Mac, preferably with 16 GB or above free space. Then click the 'Burn icon'. Now, in the window next to ISO image, click on the 'Browse' button to import Windows 10 ISO file from local hard drive.
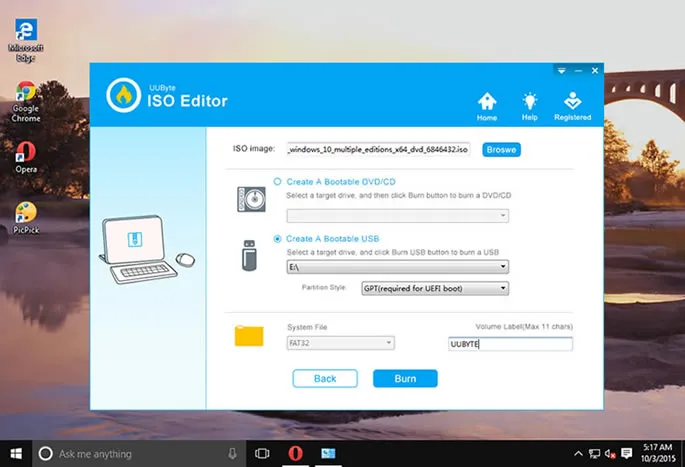
You will see the drive name of plugged USB on the main interface. And leave other setting field as default. Finally, click on the 'Burn' button and wait for the process to complete. After that, a Windows 10 bootable USB is ready for future usage.
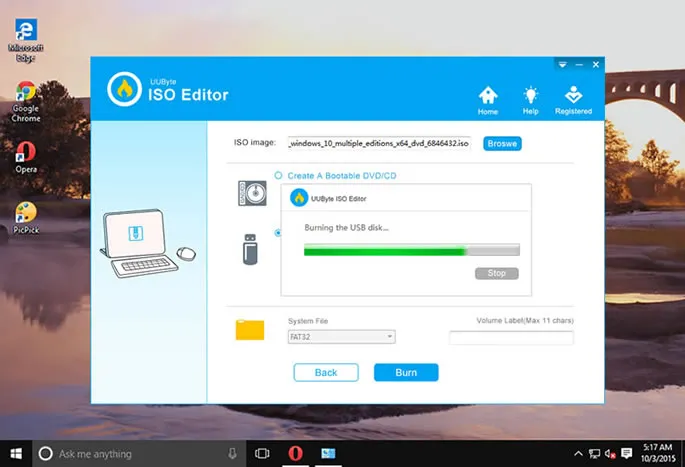
That's it. No rocket science. UUByte ISO Editor makes the process extremely simple and fast. And if done correctly, you can use the Windows 10 bootable USB on to boot crashed Windows 10 system or make a refresh install.
The second method does not involve the installation of a third-party app. Instead, we make use of a pre-built Terminal app on macOS Catalina to create a Windows 10 bootable USB. Terminal app is the equivalent of Command Prompt on Windows. All the tasks are done under text commands. And this may be a little harsh for normal users.
However, this really works for creating Windows 10 bootable USB on Mac Catalina. While there wouldn't be a need to download another app for the process this time, the Windows 10 ISO file is still required to be downloaded in advanced.
Step 1: Navigate to the ''Applications' folder and open Terminal app in 'Utilities' folder.
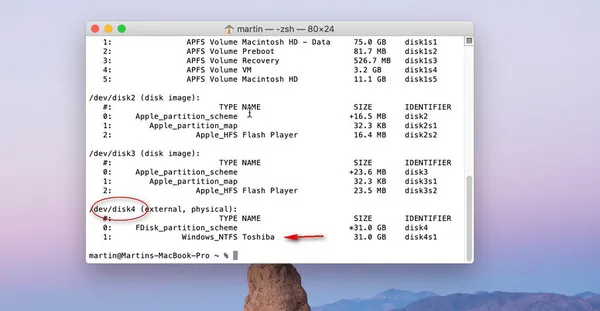
Step 2: Insert an USB on Mac Catalina and type "diskutil list" command to find the drive letter of plugged USB drive. In the following example, the USB drive name is disk4.
Step 3: Now type or copy and paste the following command on the Terminal window to clean and format the USB, also name it as WINDOWS10. In the following command, replace the star at the end of the command with the disk number, at which your desired USB is located:
diskutil eraseDisk MS-DOS "WINDOWS10" GPT disk*
Step 4: Press Enter to run the command. Now, double click the Windows 10 ISO file to mount it on Mac Catalina. You can also mount the ISO file using command:
hdiutil mount ~/path/to/windows10/iso/file
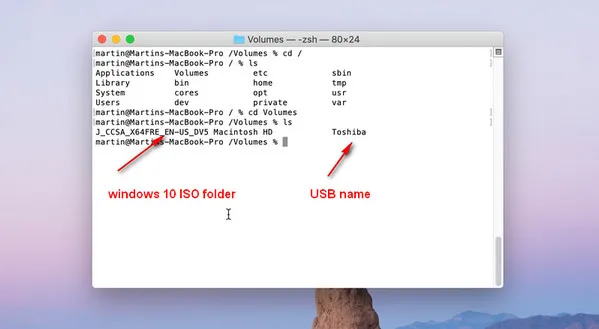
Step 5: You will see the USB name and Windows 10 ISO folder in the root of Volumes folder. And input the following command to copy files from Windows 10 ISO folder to target USB.
cp -rp /Volumes/(Windows 10 folder)/* /Volumes/WINDOWS10/
Step 6: The last command will copy all files and sub folders to target USB drive. So takes about 20 minutes to complete the copying operation.
Step 7: Unmount the USB and eject from Mac. Now, you can use it for Windows 10 installation or system repair.
Using Terminal is far more complicated than using third-party ISO burning tools but at least it is actionable trick to to createa Windows 10 bootable USB on Mac Catalina. If you were not comfortable with it, then UUByte ISO Editor is your best bet.
Another alternative solution is using Etcher for creating a Windows 10 bootable USB drive on macOS Catalina. After going through the complicated process of Terminal, using a third-party software pretty much proves to be a much easier option for burning Windows ISO to USB on macOS.
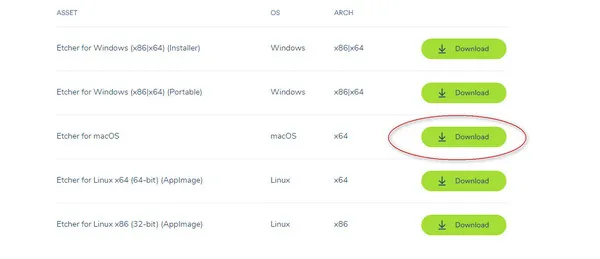
Step 1: The first step requires you to download Etcher from its official website. On the website, scroll down the page to find downloading options for different OS, click on the download button next to MacOS and follow suit to successfully install the software on your macOS Catalina.
Step 2: Insert your USB that you plan to burn. The minimal storage for USB is 16 GB USB.
Step 3: Open and run Etcher to start the process. On the user interface of Etcher, click on 'Select Image' to add downloaded Windows 10 ISO file to the app.
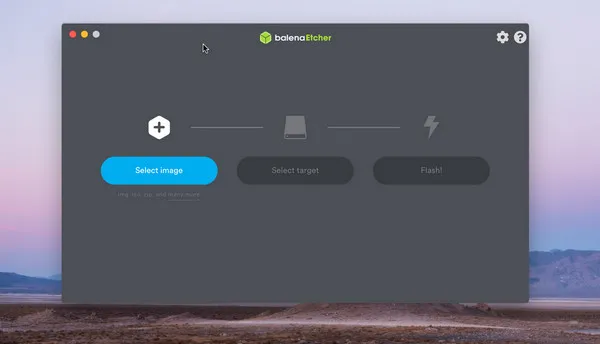
Step 4: Click on 'Select Target' button and pick upthe USB drive you need to flash. Make sure to check your USB before flashing it because Etcher will format the USB.
Step 5: Click on the 'Flash' button. Wait for the completion of the process then safely eject the USB from Mac Catalina.
Etcher is an easy and fast solution to create Windows 10 bootable USB on Mac Catalina. But, despite the simplicity, Etcher may not be the best solution as many people reports of malfunctioning and failing on latest Windows 10 ISO
A bootable USB is an emergency item required to quickly repair, recover or install OS on a new or failing computer. ISO files tend to get corrupted in the process and that is why a flash drive may need to be burned a few times to become a perfect bootable USB. UUByte ISO Editor removes the requirement of redoing from the process, making the process shortest. The software increases efficiency and can be trusted over any other method to create Windows 10 bootable USB on Catalina as well as other macOS versions like Mojave, High Serria.
![]()
![]()
![]()
![]()

