Case A: In many cases, this procedure is done when we sell on the second hand or even give our device to a friend or family member so you can use, and do not want others to access our privacy information.
Case B: You may feel the performance of a Android device is slowing because of junk files that occupy the memory system, you Android phone often doesn't work correct, poorly functioning.
No matter the reason, you should always format and reset the device. It's necessary to let you understand that Android formatting means just deleting the user data i.e images, videos, songs, contact numbers, etc which you have saved in the phone memory. It will not touch the operating system. Formatting a Android brings the total loss of user information, not the system itself. Equivalent to formatting a PC, the system would remain intact, but completely clean customizations.
As discussed earlier, there are several reasons to format your mobile Android…
1). When you go to sell your second-hand device or give your phone to someone else to use it.
2). When you return your device for service and do not want to reveal personal data
3). When you lose the stability of the system and want to start customizing from scratch.
4). Formatting a cell phone is required when it is infected by virus.
Note: I would strongly suggest that you'd better back up android data to computer in advance before formatting an Android phone like Samsung Galaxy, HTC, LG, Sony, Nexus,etc.
As I said before, a factory reset will erase all of your phone's data and restore it to the original settings, all of your data will gone forever and can't be recovered. So, don't forget to make a backup of your ipmortant data. This guide will walk you through formatting your device.
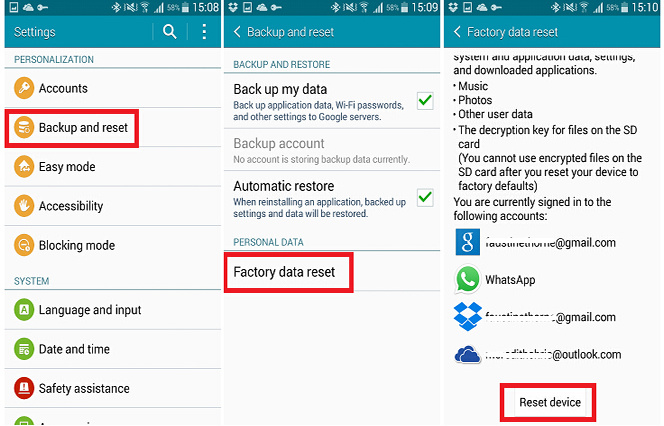
Open the menu and select Settings, then in the section, choose Personal Backup and restore. Once inside we choose Factory data reset. Tap “Reset device” to delete all data on your phone and restore original factory settings. By default, all your phone's internal storage will be erased. After a few minutes you will have a whole new phone!
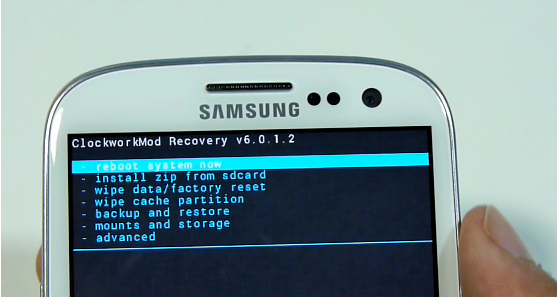
Another method to formatting a android is a little more complicated because it requires you to enter recovery mode. Just follow the steps below.
1) Turn off your Android phone, press and hold the VOLUME UP button for some seconds
2) If you do OK you will get into recovery mode menu.
3) You can navigate the menu with the volume buttons and locate the factory reset mode, then confirm it.
In the event that your phone has MicroSD, not all devices accept, as the range of Nexus One or HTC, the answer is no, the SD card can be formatted independently if desired, factory reset doesn't clear the internal SD. If you need, you can try this steps: Go to Settings->Storage->Format SD card.
It will not replace the custom ROM if you perform factory reset on your phone, but it will reset the device to the way it was right after you installed the ROM on your device. I've formatted my Android tablet with the part 1 method.
The data that was deleted by factory reset can be recoverabled by professional Android data recovery software. So it is not a safe way to keep your privacy under protection. If you really cared about the information on Android device, then you should use Android data erasing tool to permanently wipe everything on Android phone or tablet.
In the following example, We are taking Androidphonesoft Android Eraser as a demo. We already tested the program on various devcies, including Samsung Galaxy S6, LG G5, Xperia Z3 and HTC One M8. It works well on all the devices. We also purchased commercial data recovery software and tried to get content after erasing. However, nothing was scanned.
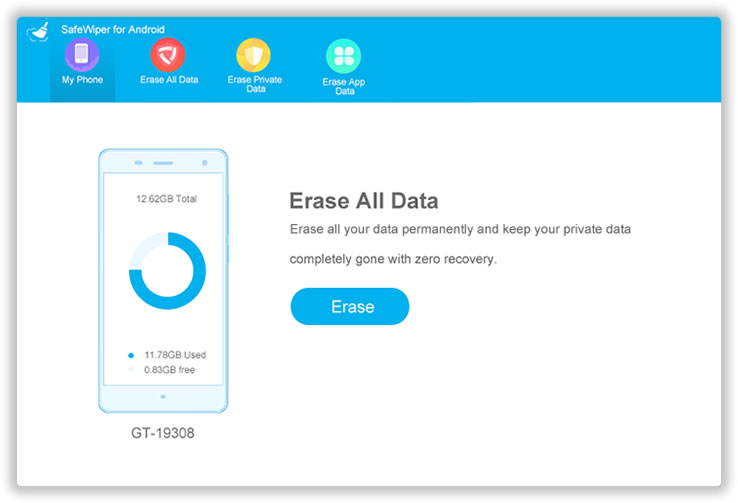
The first step is to download Android Data Eraser and follow the instructions to successfully install it on a computer. After that, open the program and you will get 3 erasing options. In here, we need to choose 'Erase All Data' from the main window.
Please check whether USB debugging function is enabled on the phone. If not, you need to follow the steps in below picture to turn it on. Then connect the device to computer with USB cable. A few seconds later, you will find out the phone was detected by the program.
Note: If the program couldn't detect the phone, please download and install the latest USB driver for the device.

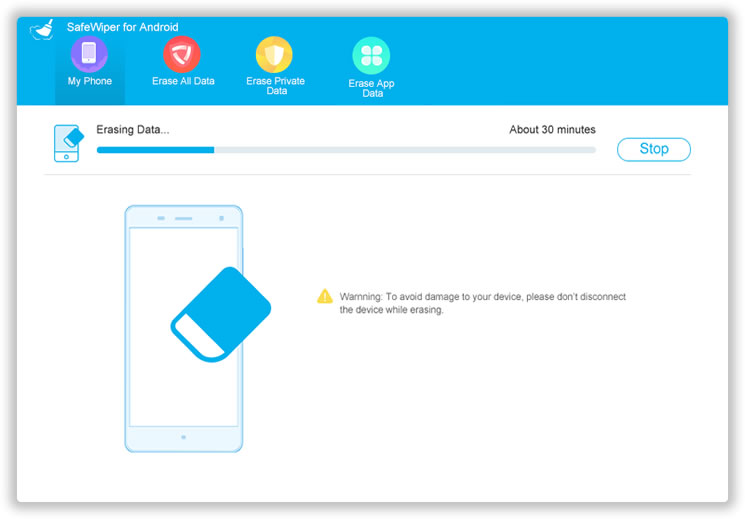
Now click 'Erase' button to let the program fully scan all the content and settings on the device. This will take 7-10 minutes. After that, type 'Erase' in the input box to confimr the erasing operation. A few minutes later, all the personal data on the device will be removed cleanly.
To make the formatting more secure, it is highly recommended to factory reset the device again after erasing. After doing this, there is no way to get anything from the phone.
This article demostrates 3 methods to delete data from Android phone or tablet. You can take any of them as you like. Each one has its own pros and cons. Please carefully read them before action. My personal favorite is Method 3 because it is more safe to protect sensitive data being seen by others.
![]()
![]()
![]()
![]()